


🎯 Importance of Data Analysis
The significance of data analysis in business has grown substantially, offering organizations valuable insights to enhance decision-making. Amazon's suite of data analysis tools presents a robust solution for collecting, structuring, and scrutinizing data from diverse origins.
These tools empower businesses to uncover latent trends, intricate patterns, and interconnections within their data that might have remained overlooked otherwise. Beyond merely pinpointing issues or opportunities, data analysis facilitates the optimization of business processes, leading to heightened efficiency and increased profitability.
The ability to access precise and timely data is a pivotal factor for success. Amazon's array of data analysis tools not only addresses this need but also serves as a formidable platform for businesses aiming to achieve their goals through comprehensive and insightful data utilization.
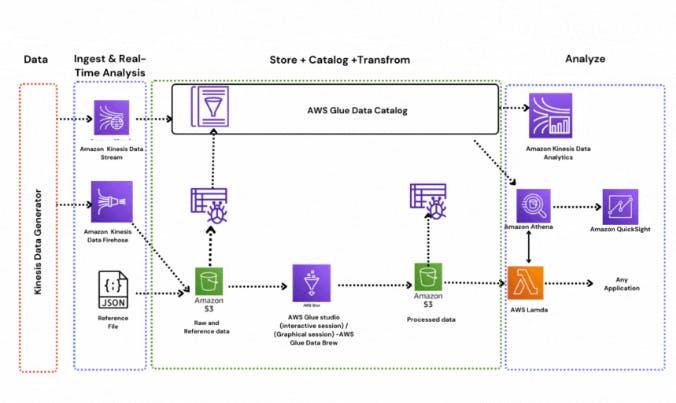
AWS offers many services for analytics section some of them are:
Amazon Athena
A serverless interactive query service designed for effortless analysis of data stored in Amazon S3 using SQL queries. With no infrastructure management requirements, users can seamlessly explore and analyze their data, paying only for the specific queries executed.
Amazon EMR
It offers a Hadoop-managed infrastructure, enabling the rapid and cost-efficient processing of extensive datasets across dynamically scalable EC2 instances. EMR notebooks, akin to Jupyter notebooks, furnish a collaborative environment for dynamic querying and exploratory analysis. Emphasizing robust security and reliability, this platform caters to diverse use cases such as machine learning, scientific simulations, log analysis, web indexing, data transformations (ETL), and bioinformatics.
Amazon CloudSearch
This AWS Cloud-managed service simplifies the establishment, administration, and scalability of a search solution for websites or applications. Supporting 34 languages, it incorporates functionalities like highlighting, auto-complete, and geospatial search capabilities, making the process straightforward and user-friendly.
Amazon ElasticSearch service
It aids ElasticSearch in deploying, securing, operating, and scaling the searching, analysis, and real-time visualization of data. Equipped with user-friendly APIs, it serves various purposes including log analysis, full-text search, meeting scaling demands, application monitoring, clickstream analytics, and ensuring security
Amazon Kinesis
It simplifies the collection, processing, and analysis of real-time data, facilitating the swift extraction of insights for prompt decision-making. This includes the ingestion of diverse real-time data types such as video, audio, application logs, website clickstreams, and IoT telemetry data intended for machine learning. Unlike traditional methods that require waiting for all data to arrive before preprocessing, this system allows for immediate responses. Current services under this umbrella include Kinesis Data Firehose, Kinesis Data Analytics, Kinesis Data Streams, and Kinesis Video Streams.
Amazon Redshift
This data warehouse is a fast and scalable solution designed for the efficient and cost-effective analysis of user data. Leveraging machine learning, massively parallel query execution, and columnar storage on high-performance disks, it achieves performance speeds ten times faster than alternative data warehousing services. It enables querying of petabytes of data and allows for the rapid setup and deployment of a new data warehouse within minutes.
Amazon Quicksight
This cloud-driven business intelligence service is known for its speed and efficiency in delivering insights to organizational members. Users can generate and share interactive visual dashboards, accessible through both mobile devices and web browsers. The flexibility extends to integration with other applications, offering customers a robust and user-friendly self-service analytical platform.
AWS data pipeline
It facilitates the seamless handling and transfer of data across various AWS resources, encompassing both compute and storage devices. Data residing in its storage location can be regularly accessed, undergo transformation, and be processed on a large scale. The outcomes of these data processing tasks can then be efficiently transferred to other AWS services like S3, RDS, DynamoDB, and EMR. This system aids in constructing intricate data processing workloads, ensuring attributes such as high fault tolerance, availability, and repeatability are inherent in the process.
AWS Glue
It is a fully managed Extract, Transform, and Load (ETL) service designed to assist users in preparing and loading data for analysis purposes. Setting up and running an ETL job is a straightforward process, requiring just a few clicks within the AWS Management Console. Users can direct the service to the data storage location, where it automatically discovers and catalogs both the data and its metadata. The data stored in the Glue Catalog becomes searchable, queryable, and ready for the ETL process once cataloged.
👉Hands-on implementation of the above analytical tools.
✔ Tasks
Ingest and store data
Catalog Data
Transform data [Glue -interactive/graphical session]
Analyze data with Athena
Analyze with Kinesis Analytics
Serve with Lamda
Visualize with QuickSight
Cleanup
👉Task 1: Ingest and store data
We'll initiate the process by generating dummy data in near real-time using the Kinesis data generator utility. Subsequently, we'll channel this generated data to Amazon S3 utilizing a Kinesis Firehose delivery stream.
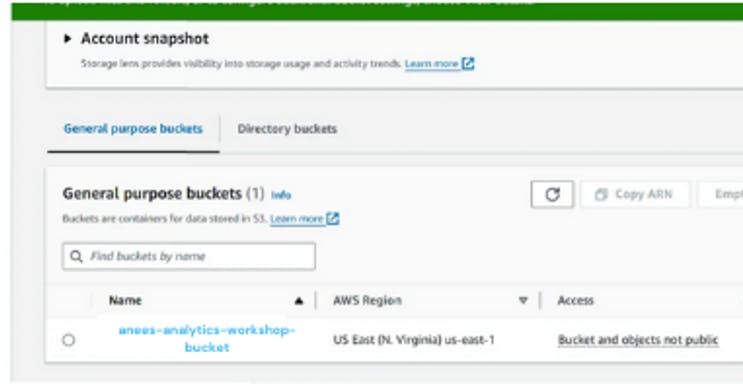
1.1 Create S3 bucket
Navigate to S3 Console & Create a new bucket in us-east-1 region :
GoTo: S3 Console Click me
Click - Create Bucket
Bucket Name :
yourname-analytics-workshop-bucketRegion: US EAST (N. Virginia)
Optionally add Tags, e.g.:
workshop: AnalyticsOnAWS
Click Create bucket
Adding reference data
Open -
yourname-analytics-workshop-bucketClick - Create a folder
A new folder called :
dataClick - Save
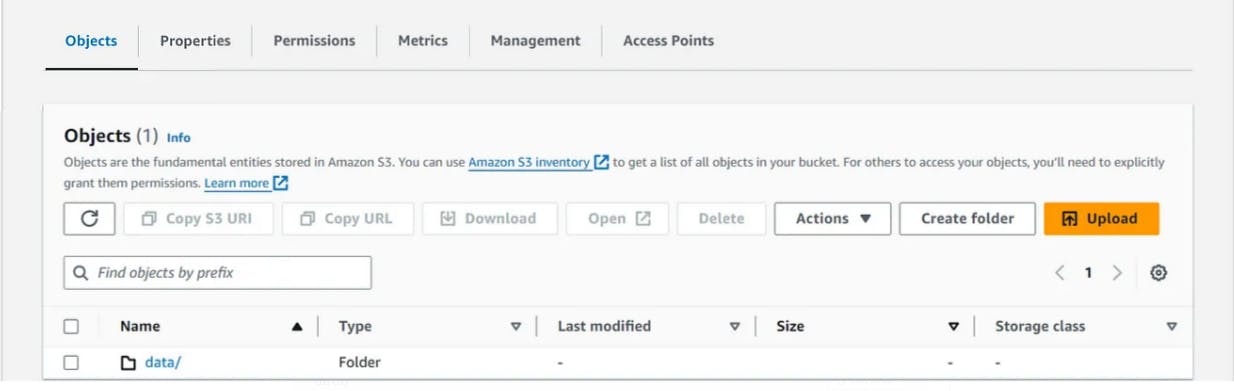
Open - data
Click - Create a folder (From inside the data folder)
New folder :
reference_data
Click - Save
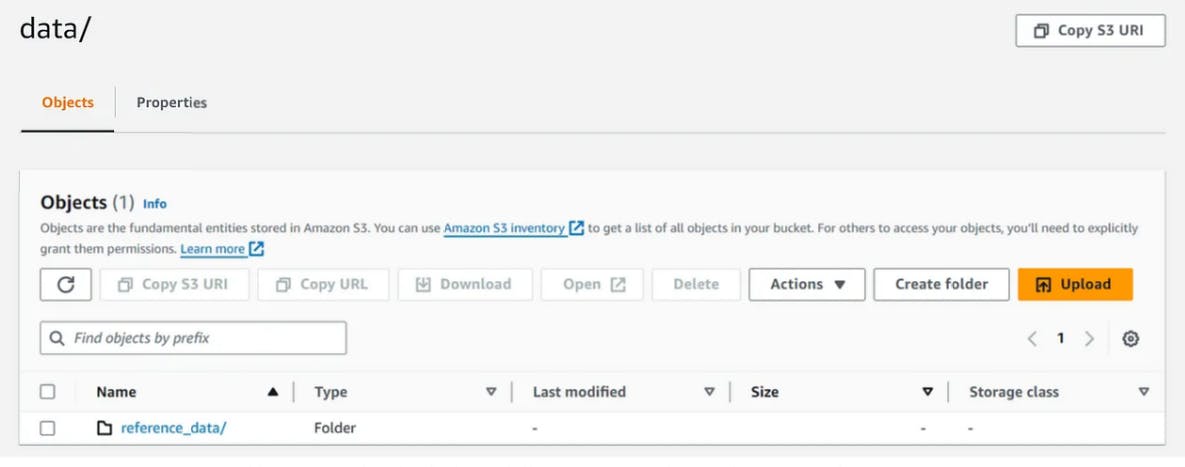
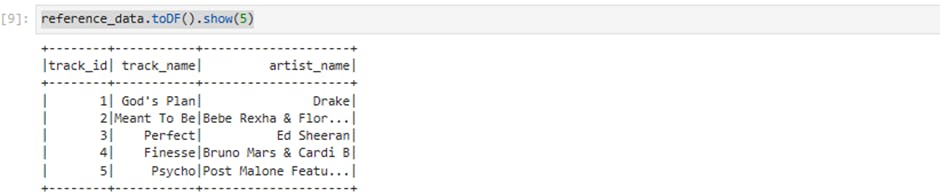
Open - reference_data
download this file locally: tracks_list.json
In the S3 Console - Click - Upload
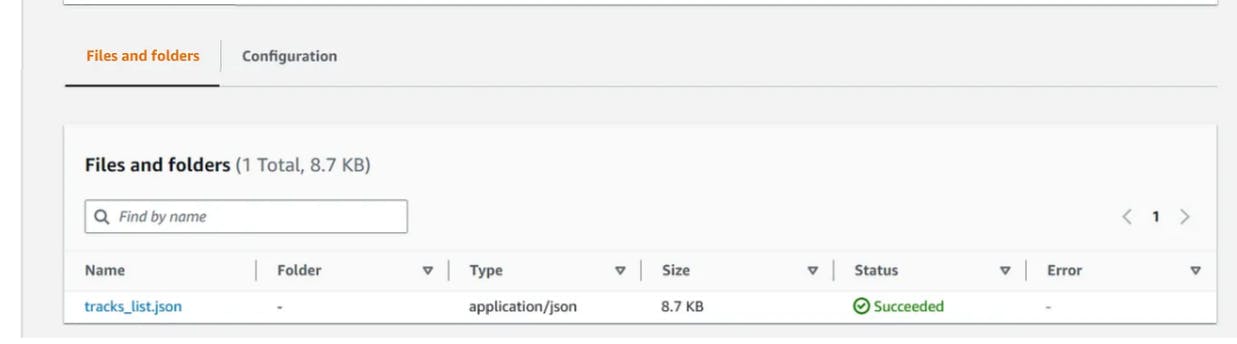
Click Add Files & upload the tracks_list.json file here
- Click Upload (bottom left)
1.2 Create Kinesis Firehose
In this step, we will navigate to the Kinesis Console & create a Kinesis Firehose delivery stream to ingest data & store it in S3:
GoTo: Kinesis Firehose Console Click me
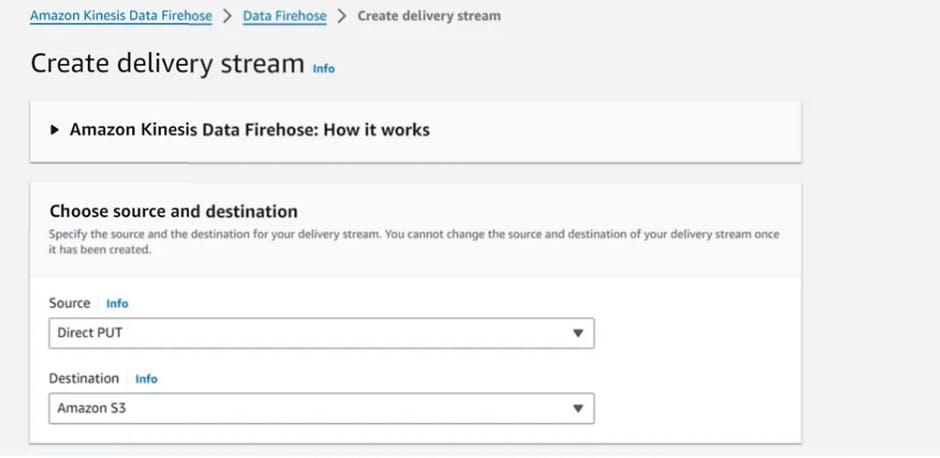
Click Create Delivery stream
Step 1: Choose the source and destination
Source: Direct PUT
Destination: Amazon S3
Step 2: Delivery stream name
Delivery stream name:
analytics-workshop-stream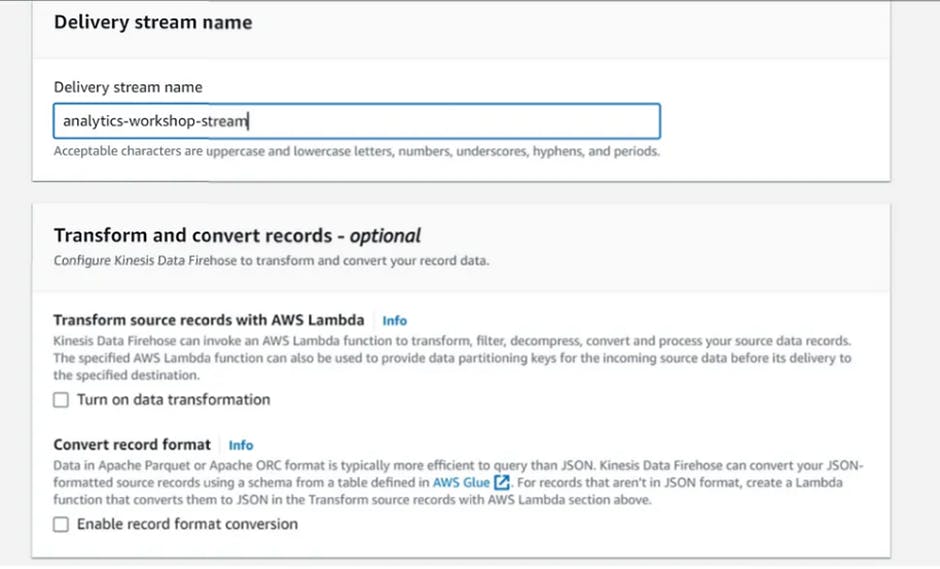
Step 3: Transform and convert records
Transform source records with AWS Lambda: Disabled (Leave 'Enable data transformation' as unchecked)
RecConvert record format: Disabled (Leave 'Enable record format conversion' as unchecked)
Step 4: Destination settings
S3 bucket: yourname-analytics-workshop-bucket
Dynamic partitioning: Not Enabled
S3 bucket prefix:
data/raw/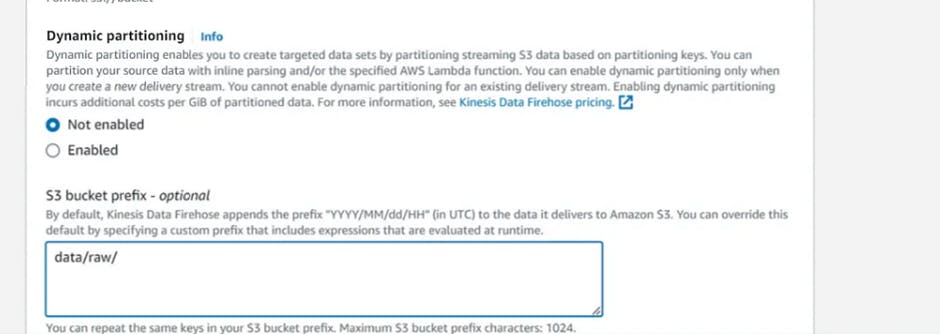
(Note: the slash / after raw is important. If you miss it Firehose will copy the data into an undesired location)
S3 bucket error output prefix: Leave Blank
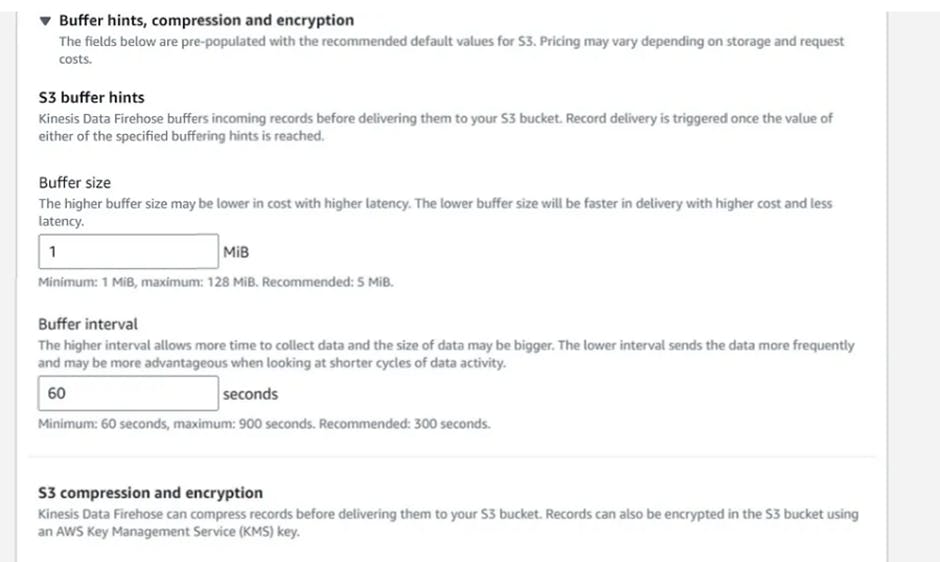
Expand Buffer hints, compression and encryption
Buffer size: 1 MiB
Buffer interval: 60 seconds
Compression for data records: Not Enabled
Encryption for data records: Not Enabled
Step 5: Advanced settings
Server-side encryption: unchecked
Amazon Cloudwatch error logging: Enabled
Permissions: Create or update IAM role KinesisFirehoseServiceRole-xxxx
Optionally add Tags, e.g.:
Key:
workshopValue:
AnalyticsOnAWS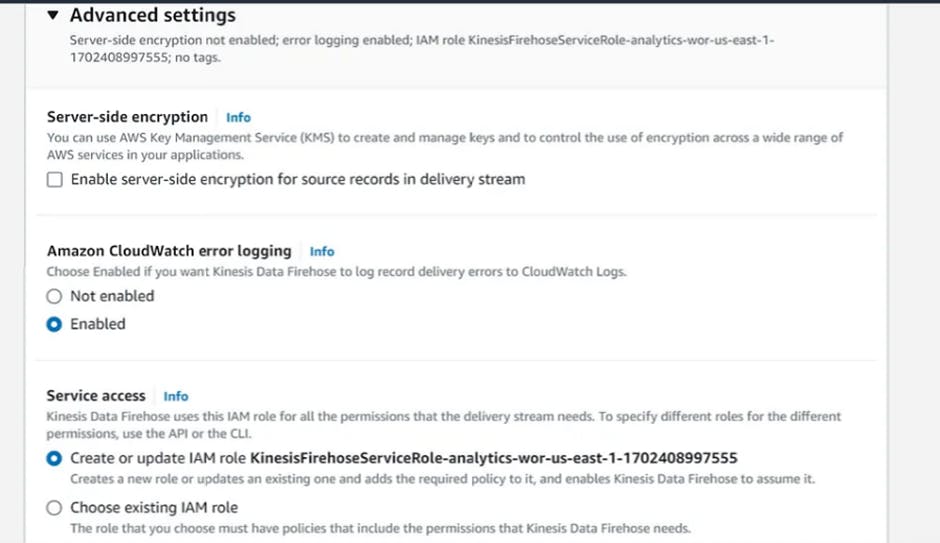
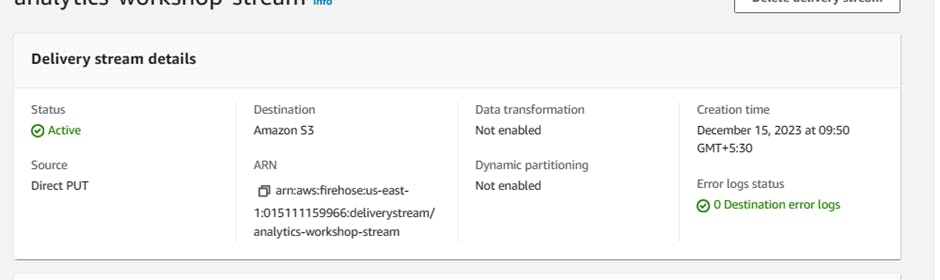
Step 6: Review
Review the configuration & make sure it's as mentioned above
Click - Create delivery stream
1.3 Generate Dummy Data
In this step we will configure Kinesis Data Generator to produce fake data and ingest it into Kinesis Firehose
Configure Amazon Cognito for Kinesis Data Generator - In this step, we will launch a cloud formation stack that will configure Cognito. This cloud formation script launches in N.Virginia region (No need to change this region)
Goto: https://console.aws.amazon.com/cloudformation/home?region=us-east-1#/stacks/new?stackName=Kinesis-Data-Generator-Cognito-User&templateURL=https://aws-kdg-tools-us-east-1.s3.amazonaws.com/cognito-setup.json
Click Next
Specify Details:
Username: admin
Password: choose an alphanumeric password
Click Next
Options:
Optionally add Tags, e.g.:
- workshop: AnalyticsOnAWS
Click Next
Review:
Scroll down
I acknowledge that AWS CloudFormation might create IAM resources: Check
Click Create stack
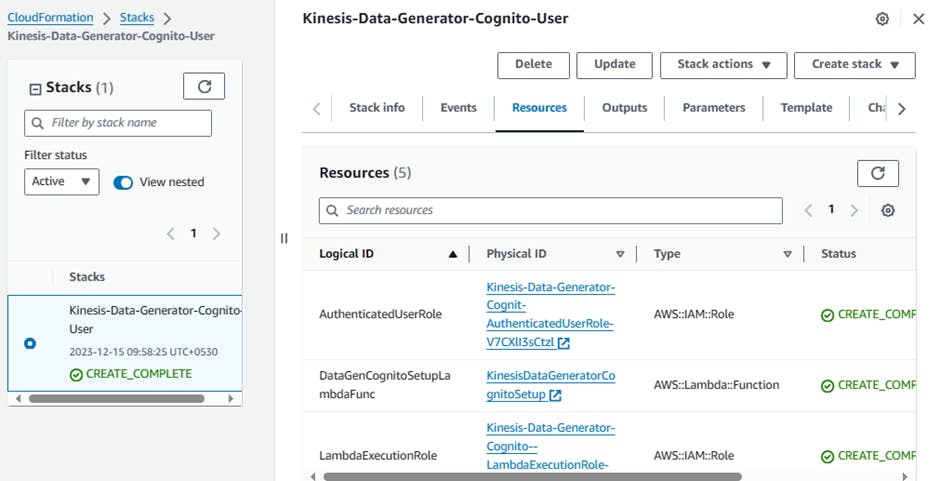
Refresh your AWS Cloudformation Console
Wait till the stack status changes to Create_Complete
Select the Kinesis-Data-Generator-Cognito-User stack
GoTo outputs tab: click on the link that says: KinesisDataGeneratorUrl - This will open your Kinesis Data Generator tool
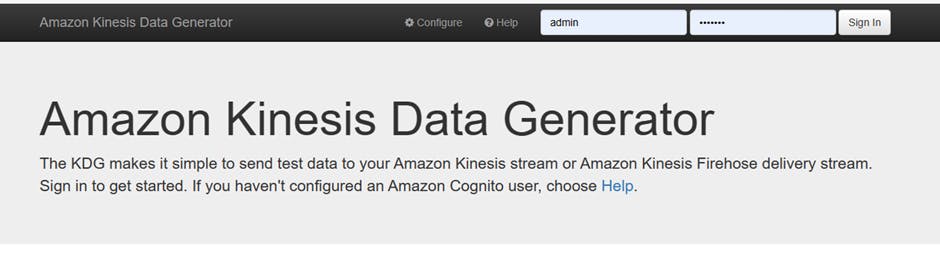
On the Amazon Kinesis Data Generator homepage
Log in with your username & password from the previous step
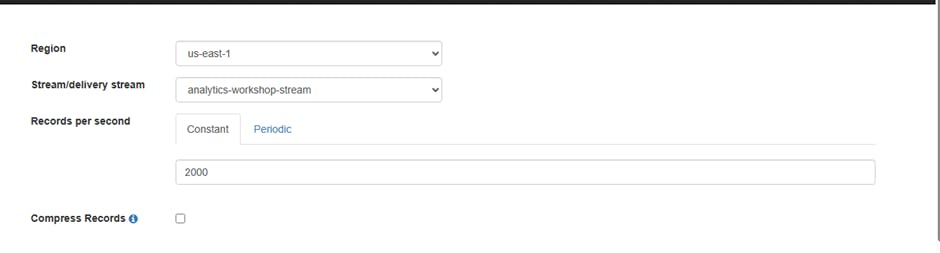
Region: us-east-1
Stream/delivery stream: analytics-workshop-stream
Records per second: 2000
Record template (Template 1): In the big text area, insert the following JSON template:
  {
      "uuid": "{{random.uuid}}",
      "device_ts": "{{date.utc("YYYY-MM-DD HH:mm:ss.SSS")}}",
      "device_id": {{random.number(50)}},
      "device_temp": {{random.weightedArrayElement(
      {"weights":[0.30, 0.30, 0.20, 0.20],"data":[32, 34, 28, 40]}
      )}},
      "track_id": {{random.number(30)}},
      "activity_type": {{random.weightedArrayElement(
          {
              "weights": [0.1, 0.2, 0.2, 0.3, 0.2],
              "data": ["\"Running\"", "\"Working\"", "\"Walking\"", "\"Traveling\"", "\"Sitting\""]
          }
      )}}
  }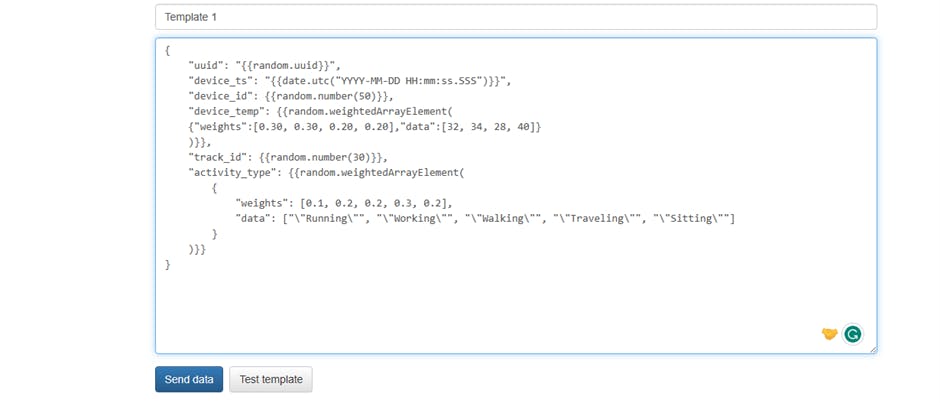
Click - Send Data
Once the tool sends ~10,000 messages, you can click on - Stop sending data to Kinesis
1.4 Validate that data has arrived in S3
After a few moments go to the S3 console Click me
Navigate to: yourname-analytics-workshop-bucket > data

There should be a folder called raw > Open it and keep navigating, you will notice that Firehose has dumped the data in S3 using yyyy/mm/dd/hh partitioning
Create IAM Role
In this step we will navigate to the IAM Console and create a new AWS Glue service role. This allows AWS Glue to access the data stored in S3 and to create the necessary entities in the Glue Data Catalog.
Go to: Click me
Click Create role

Choose the service that will use this role: Glue
Click Next
Search for AmazonS3FullAccess

- Select the entry's checkbox
Search for AWSGlueServiceRole
- Select the entry's checkbox
Click Next
Role name:
AnalyticsworkshopGlueRoleMake sure that only two policies attached to this role (AmazonS3FullAccess, AWSGlueServiceRole)
Optionally add Tags, e.g.:
- workshop: AnalyticsOnAWS
Click Create role

👉Task 2: Catalog data
2.1 Create AWS Glue Crawlers
In this step, we will navigate to AWS Glue Console & create glue crawlers to discovery the schema of the newly ingested data in S3.
Go to: Click me

On the left panel, click on Crawlers
Click on Create crawler
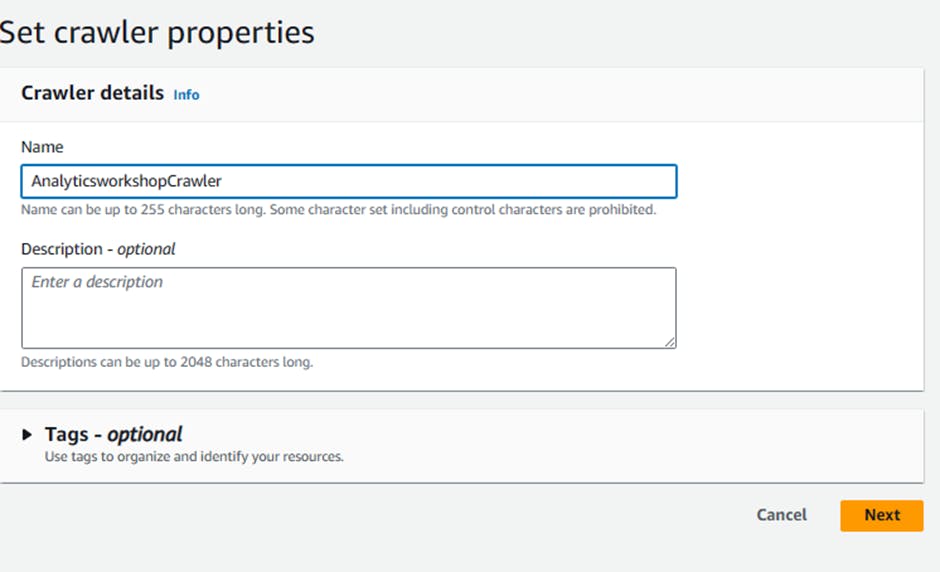
Crawler info
Crawler name:
AnalyticsworkshopCrawlerOptionally add Tags, e.g.:
- workshop: AnalyticsOnAWS
Click Next
Click Add a data source
Choose a Data source:
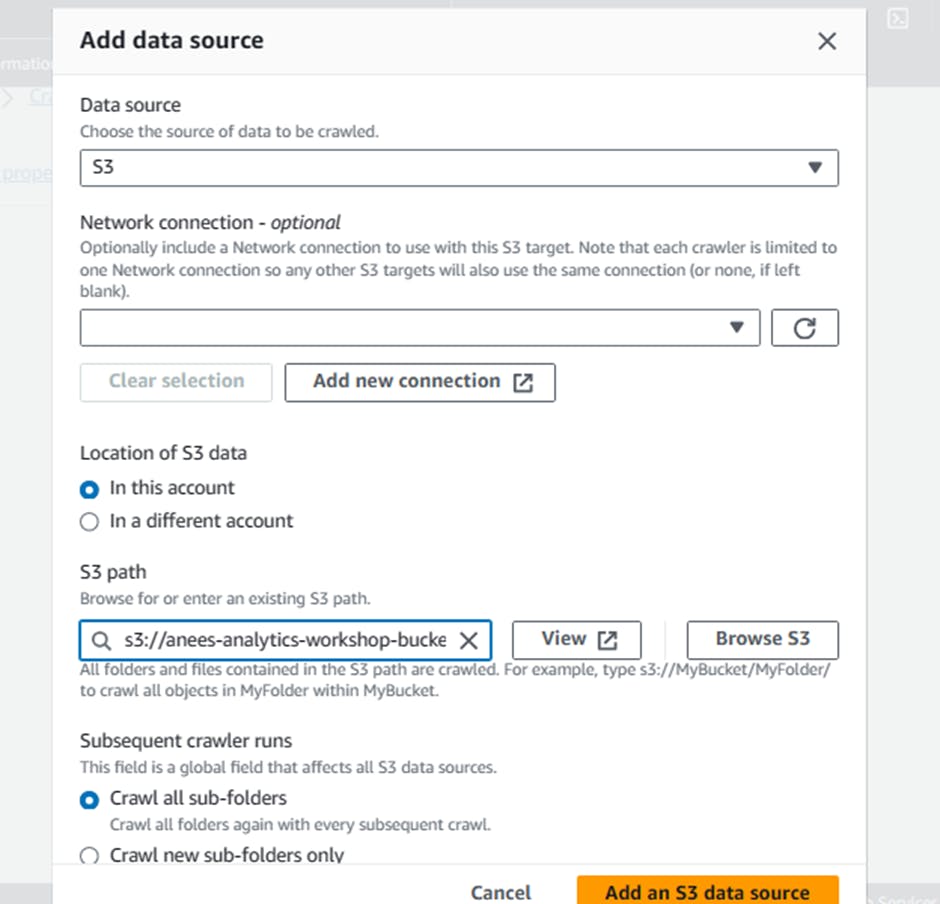
Data source: S3
Leave Network connection - optional as-is
Select In this account under Location of S3 data
Include S3 path:
s3://yourname-analytics-workshop-bucket/data/Leave Subsequent crawler runs to default selection of Crawl all sub-folders
Click Add an S3 data source
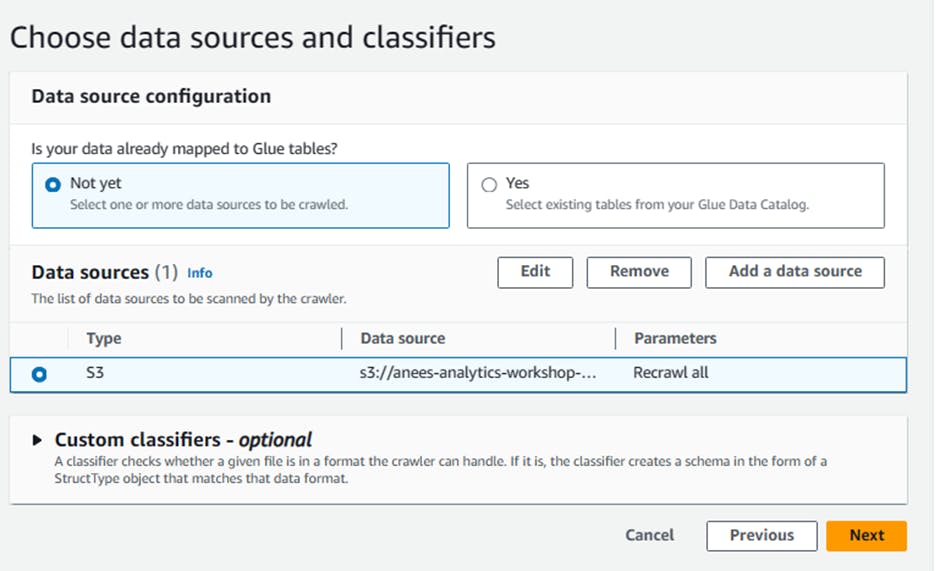
Select recently added S3 data source under Data Sources
Click Next
IAM Role
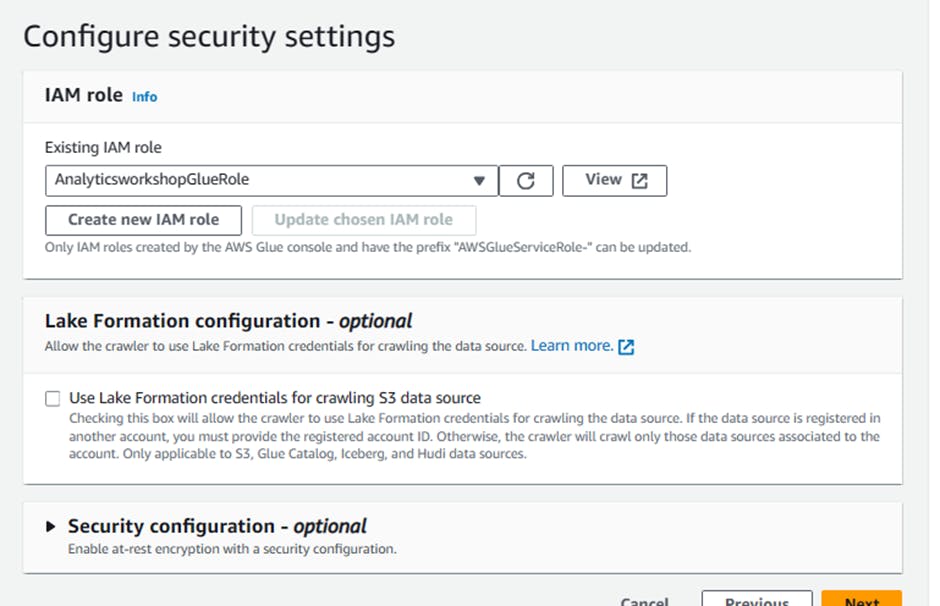
Under Existing IAM role, select
AnalyticsworkshopGlueRoleLeave everything else as-is.
Click Next
Output configuration:
Click Add database to bring up a new window for creating a database.
Database details
Name:
analyticsworkshopdb- Click Create database
Closes the current window and returns to the previous window.
Refresh by clicking the refresh icon to the right of the Target database
Choose
analyticsworkshopdbunder Target database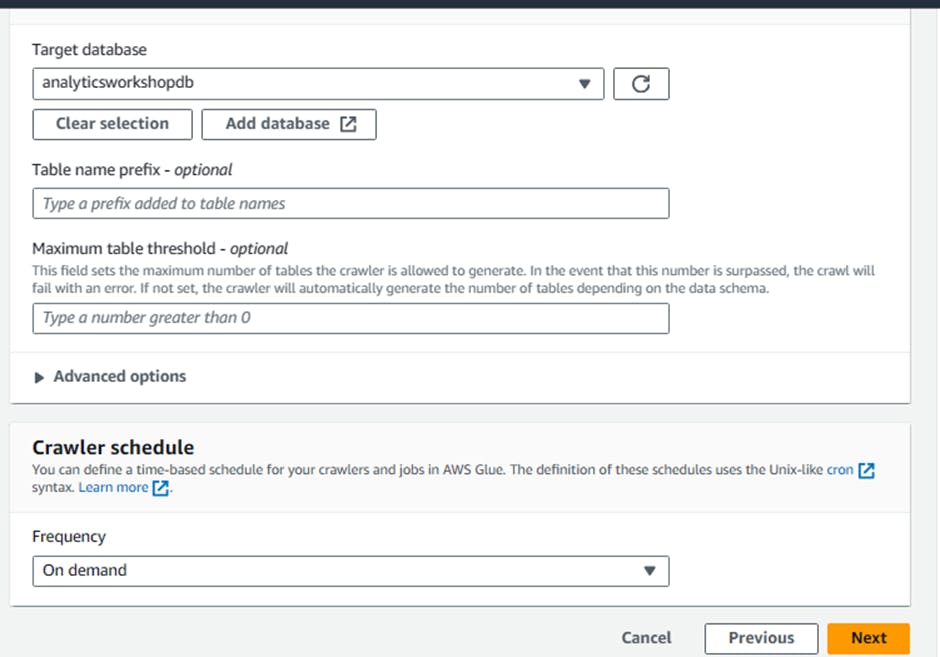
Under Crawler schedule
Frequency: On demand
Click Next
Review all settings under Review and create
Click Create crawler
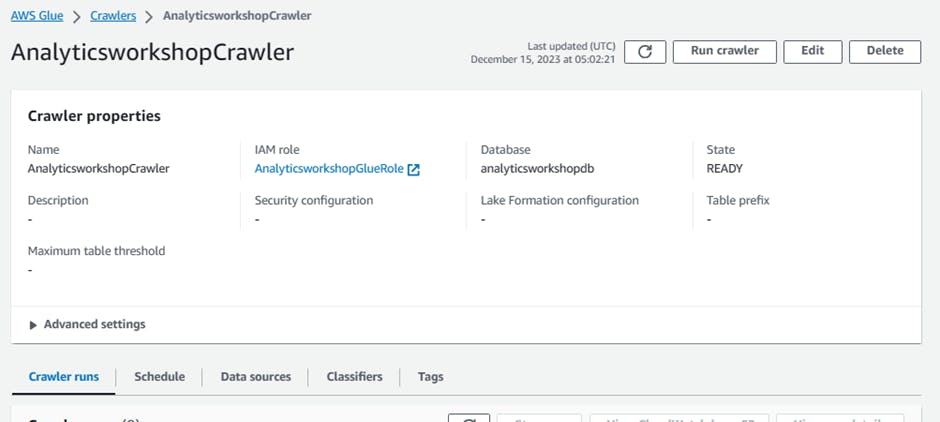
You should see this message: The following crawler is now created: "AnalyticsworkshopCrawler"
Click Run crawler to run the crawler for the first time
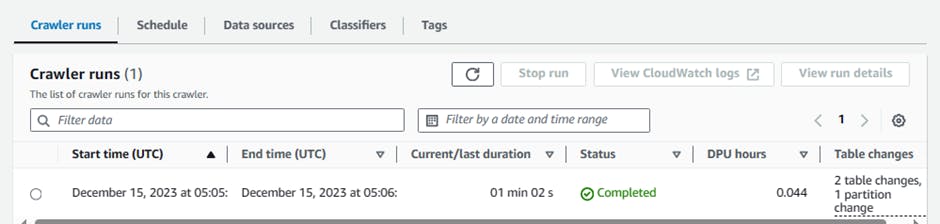
Wait for few minutes
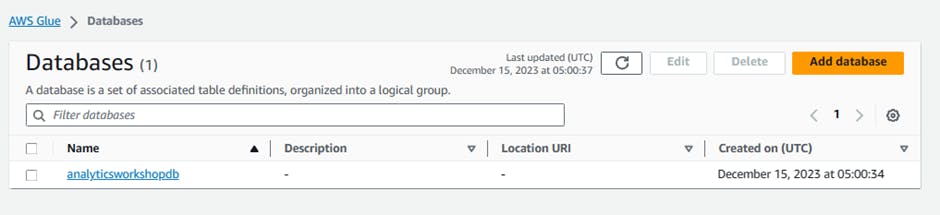
2.2 Verify newly created tables in the catalog
Navigate to Glue Catalog and explore the crawled data:
Go to: Click me
- Click analyticsworkshopdb
Click Tables in analyticsworkshopdb
Click raw

Look around and explore the schema for your dataset
look for the
averageRecordSize,recordCount,compressionType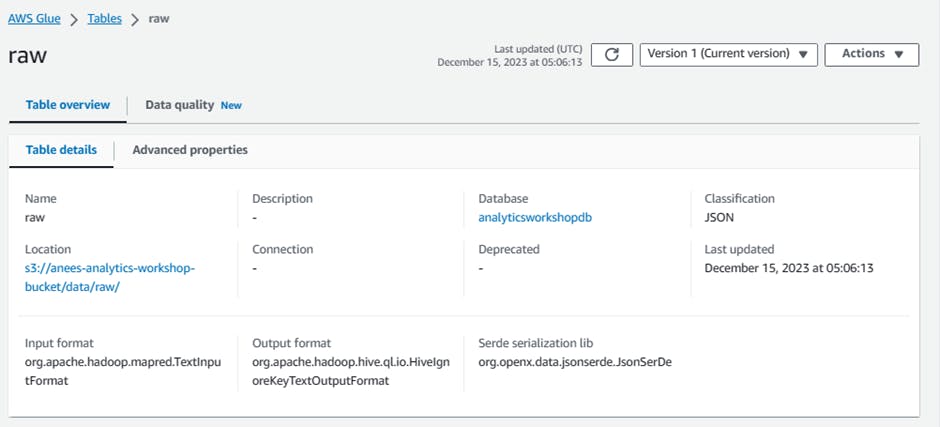

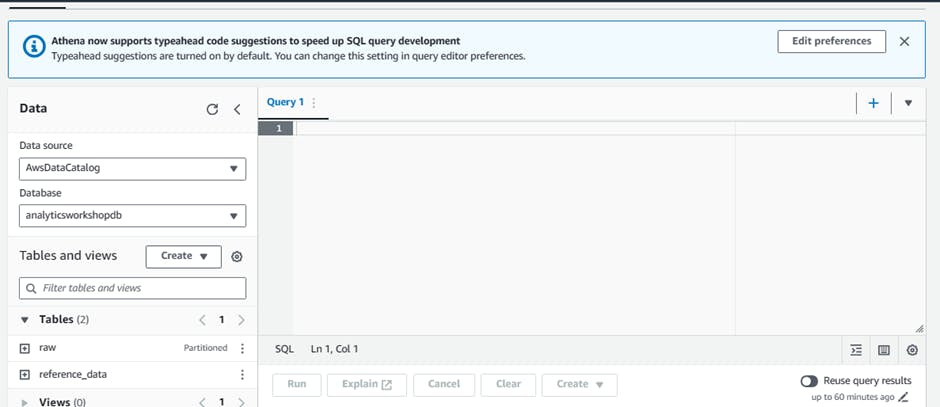
2.3 Query ingested data using Amazon Athena
Let's query the newly ingested data using Amazon Athena
Go to: Click me
If necessary, click Edit seetings in the blue alert near the top of the Athena console
Location of query result Under Query result location and encryption:
s3://yourname-analytics-workshop-bucket/query_results/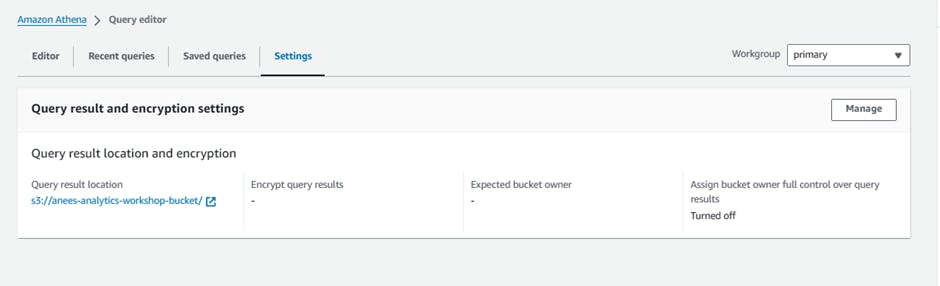
Click Save
Click Editor tab
On the left panel (Database) drop down , select analyticsworkshopdb > select table raw
Click on 3 dots (3 vertical dots) > Select Preview Table
Review the output
In query editor, paste the following query:
  SELECT activity_type,
           count(activity_type)
  FROM raw
  GROUP BY  activity_type
  ORDER BY  activity_type
Click on Run
👉Task 3: Transform data [interactive session]
3.1 Prepare IAM policies and role
Note: Skip this section if you have already created Glue IAM policy and role in Warehouse on Redshift module and jump to Use Jupyter Notebook in AWS Glue for interactive ETL development section of this module.
In this step you will navigate to IAM console and create the necessary IAM policies and role to work with AWS Glue Studio Jupyter notebooks and interactive sessions.
Let's start by creating an IAM policy for the AWS Glue notebook role
Go to: Click me
Click Policies from menu panel on the left
Click Create policy
Click on JSON tab
Replace default text in policy editor window with the following policy statemenent.
  {
    "Version": "2012-10-17",
    "Statement": [
      {
      "Effect": "Allow",
      "Action": "iam:PassRole",
      "Resource":"arn:aws:iam::<AWS account ID>:role/Analyticsworkshop-GlueISRole"
      }
    ]
  }
Note that
Analyticsworkshop-GlueISRoleis the role that we create for the AWS Glue Studio Jupyter notebook in next step.Alert: Replace with your AWS account ID in the copied policy statement.
Click Next: Tags
Optionally add Tags, e.g.:
- workshop: AnalyticsOnAWS
Click Next: Review
Policy Name:
AWSGlueInteractiveSessionPassRolePolicy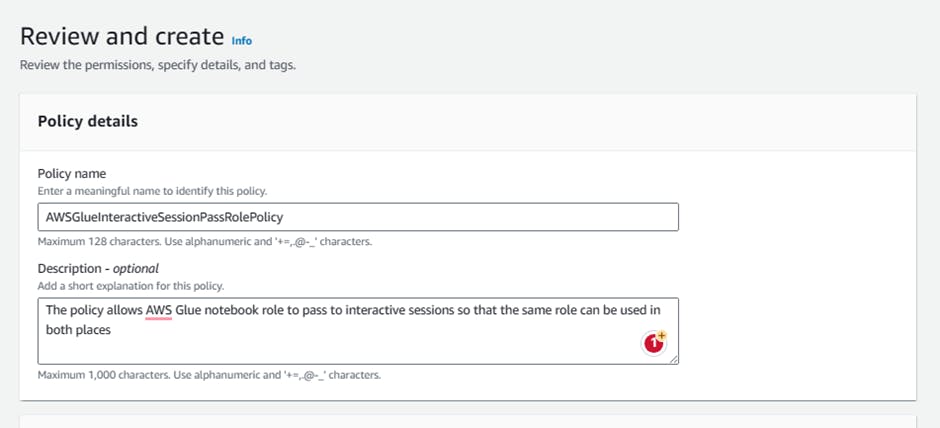
Optionally write description for the policy:
- Description:
The policy allows AWS Glue notebook role to pass to interactive sessions so that the same role can be used in both places
- Description:
Click Create policy

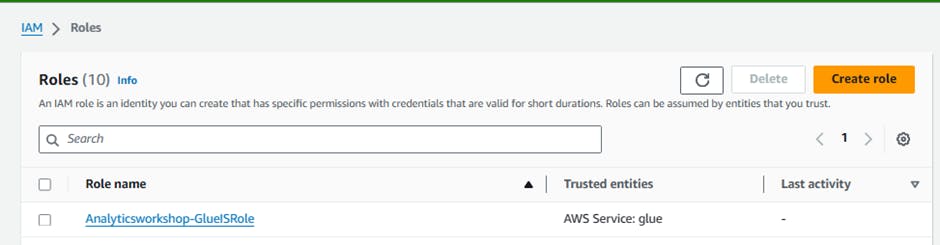
Next, create an IAM role for AWS Glue notebook
Go to: Click me
Click Roles from menu panel on the left
Click Create role
Choose the service that will use this role: Glue under Use Case and Use cases for other AWS services:
Click Next
Search for following policies and select the checkbox against them:
AWSGlueServiceRoleAwsGlueSessionUserRestrictedNotebookPolicyAWSGlueInteractiveSessionPassRolePolicyAmazonS3FullAccess
Click Next
Role name:
Analyticsworkshop-GlueISRoleMake sure only four policies are attached to this role (AWSGlueServiceRole, AwsGlueSessionUserRestrictedNotebookPolicy, AWSGlueInteractiveSessionPassRolePolicy, AmazonS3FullAccess)
Optionally add Tags, e.g.:
- workshop: AnalyticsOnAWS
Click Create role
Note: We have granted full S3 access to the Glue role for the purpose of this workshop. It is recommended to grant only the permissions required to perform a task i.e. follow least-privilege permissions model in real/actual deployments. Read more about security best practices here
For more information on getting started with notebooks in AWS Glue Studio, refer to Getting started with notebooks in AWS Glue Studio .
3.2 Use Jupyter Notebook in AWS Glue for interactive ETL development
In this step you will be creating an AWS Glue job with Jupyter Notebook to interactively develop Glue ETL scripts using PySpark.
Download and save this file locally on your laptop : analytics-workshop-glueis-notebook.ipynb
Go to: Glue Studio jobs Click me
Select Jupyter Notebook option
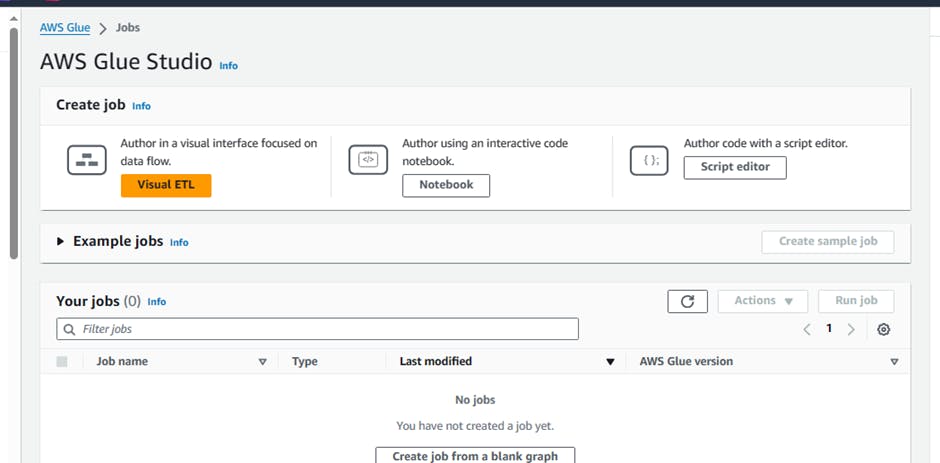
Select Upload and edit an existing notebook
Click Choose file
Browse and upload analytics-workshop-glueis-notebook.ipynb which you downloaded earlier
Click Create
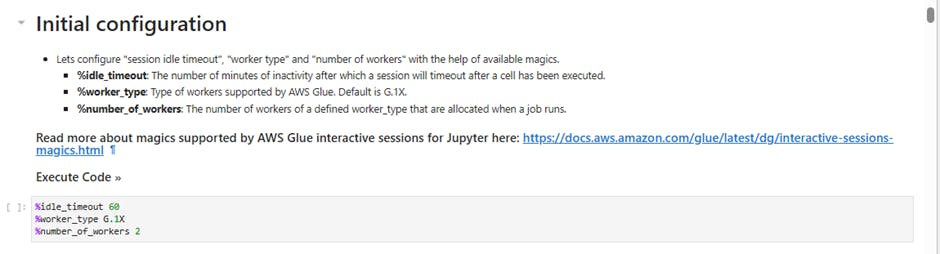
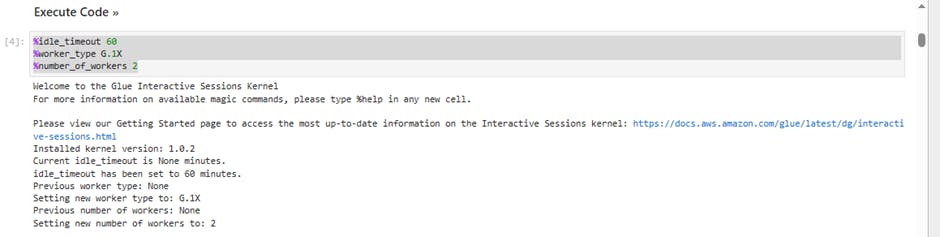
Under Notebook setup and Initial configuration
Job name:
AnalyticsOnAWS-GlueISIAM role
Analyticsworkshop-GlueISRoleLeave Kernel to default as
Spark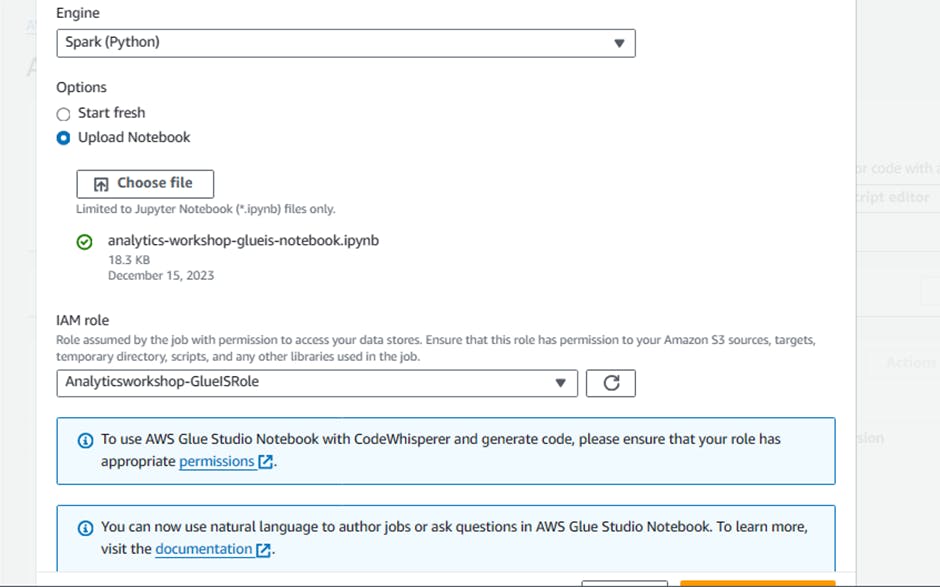
Click Start notebook
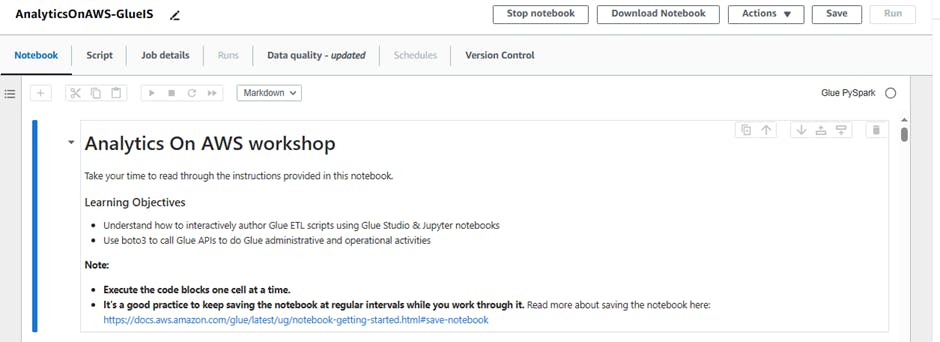
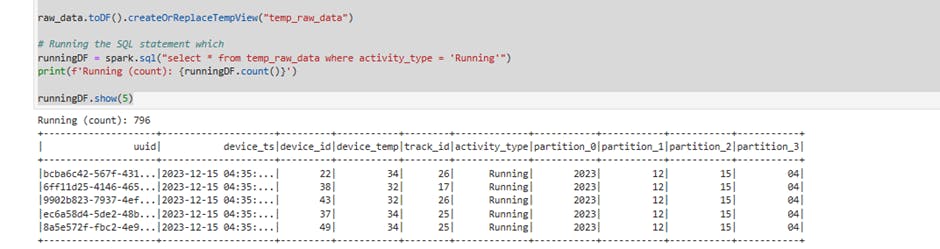
Once the notebook is initialized, follow the instructions in the notebook
Read and understand the instructions as they explain important Glue concepts


3.3 Validate - Transformed / Processed data has arrived in S3
Once the ETL script has ran successfully, return to the console: Click me
Click - yourname-analytics-workshop-bucket > data
Open the processed-data folder:
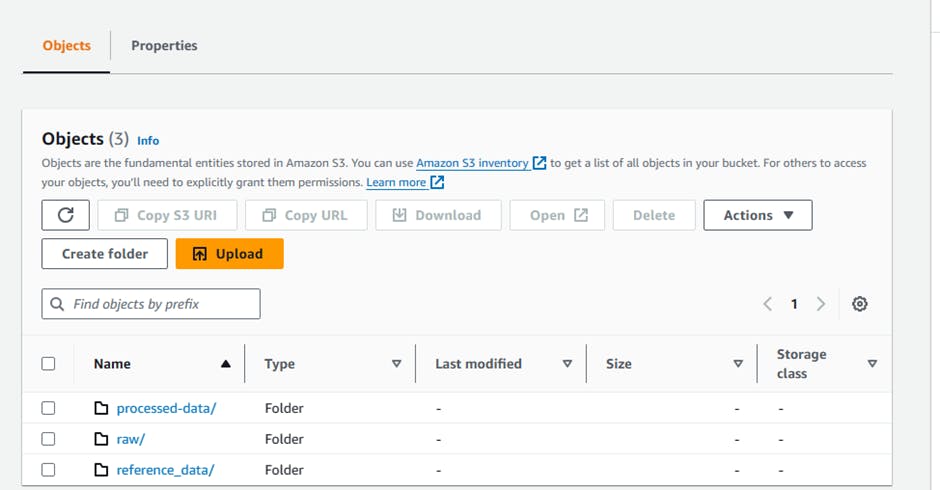
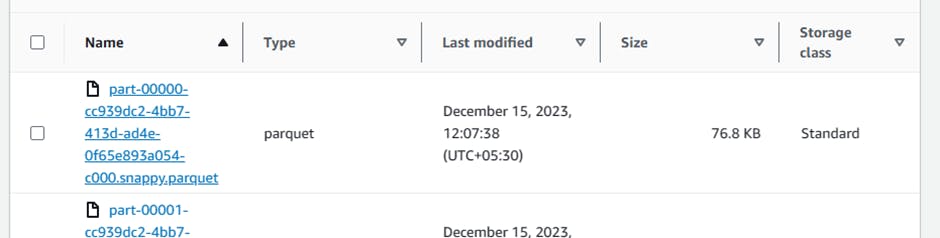
- Ensure that .parquet files have been created in this folder.
Now that we have transformed the data, we can query the data using Amazon Athena. We could also further transform/aggregate the data with AWS Glue
👉Task 4: Analyze with Athena
4.1 Explore transformed data using Athena
In this step we will analyze the transformed data using Amazon Athena.
Login to the Amazon Athena Console.
Note: Run the crawler again to reflect the processed data table in Athena
Go to: Athena Console Click me

If you see a notification requiring you to first create an S3 bucket to store the results of your queries, follow these steps:
Go to the S3 console and create a bucket using your preferred name, e.g. yourname-query-results
After creating the bucket, return to the Athena console and click 'Settings' on the top-right of the console.
Enter the name of the bucket you have just created, ensuring you include a trailing slash: s3://yourname-query-results
Hit Save
As Athena uses the AWS Glue catalog for keeping track of data source, any S3 backed table in Glue will be visible to Athena.
On the left panel, select 'analyticsworkshopdb' from the drop down
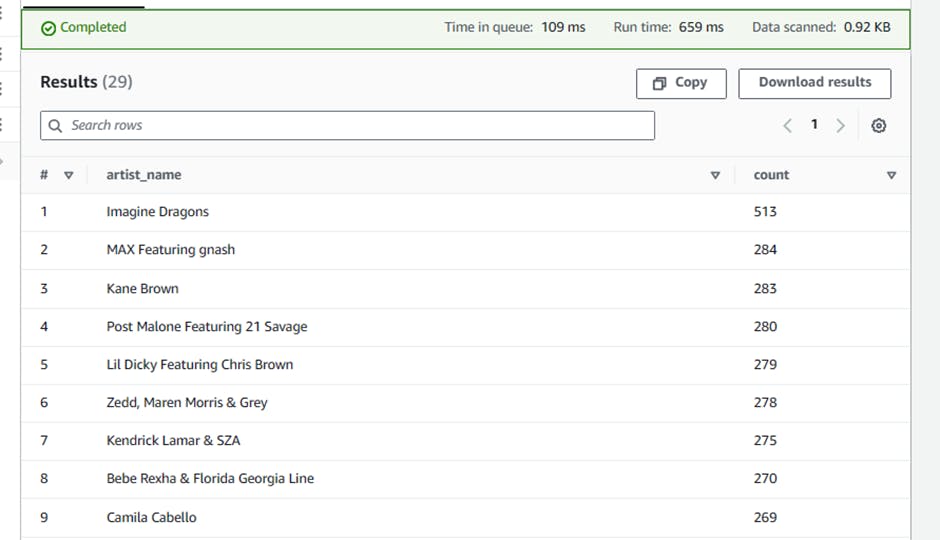
Run the following query:
  SELECT artist_name,
         count(artist_name) AS count
  FROM processed_data
  GROUP BY artist_name
  ORDER BY count desc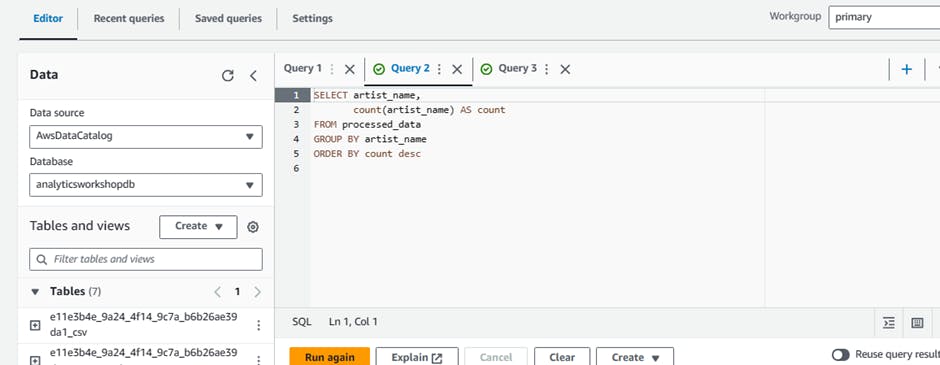
  SELECT device_id,
         track_name,
         count(track_name) AS count
  FROM processed_data
  GROUP BY device_id, track_name
  ORDER BY count desc

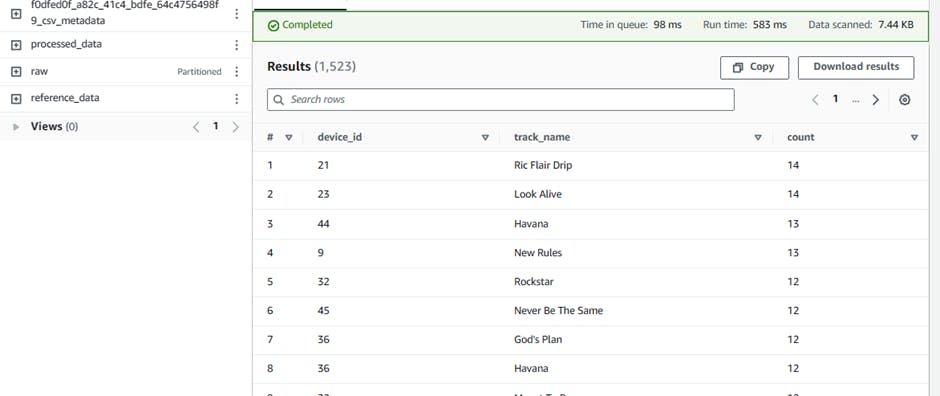
You could run similar Athena queries and explore the data further.
👉Task 5: Analyze with Kinesis Data Analyatics
In this section, we will see how to perform real-time analysis of streaming data using Amazon Kinesis Data Analytics . This can be done in 2 ways, using legacy SQL Application or using the newer recommended Studio notebook. Here we will use Studio notebook and create SQL-based Kinesis Analytics Application.
5.1 Create IAM Role
In this step we will navigate to the IAM Console and create a new Amazon Kinesis Data Analytics service role. This allows Amazon Kinesis Data Analytics service to access Kinesis Data Streams as well as AWS Glue Catalog table.
Go to AWS IAM Role: Click me
Click Create role
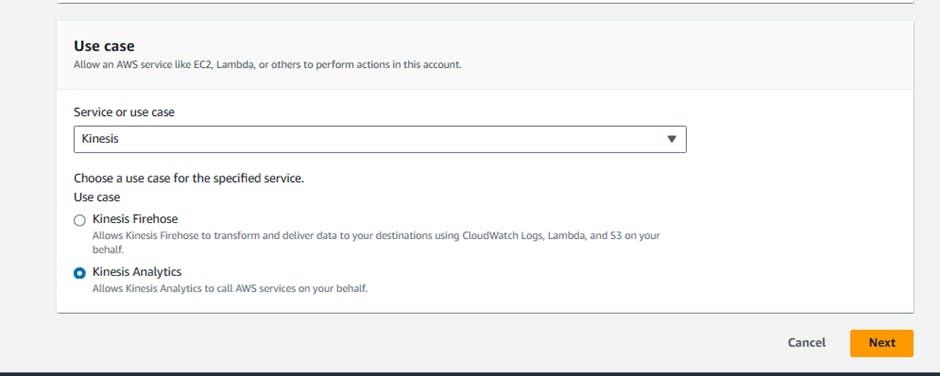
Choose Kinesis service under Use case from drop down menu that says Use cases for other AWS services:
Chose Kinesis Analytics
Click Next for Permissions
Search for AWSGlueServiceRole
- Select the entry's checkbox
Search for AmazonKinesisFullAccess
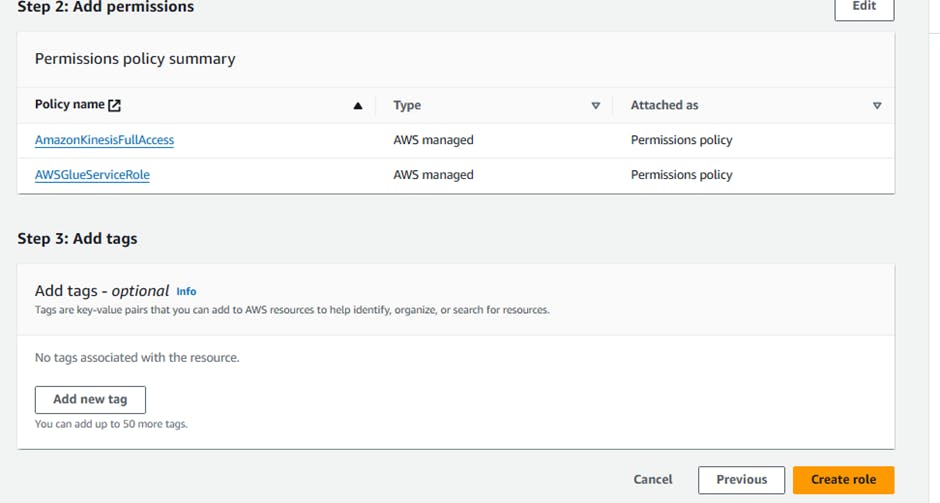
Select the entry's checkbox
NOTE: We are using full access for workshop purpose only. Grant only the necessary access if you use this role in production.
Click Next
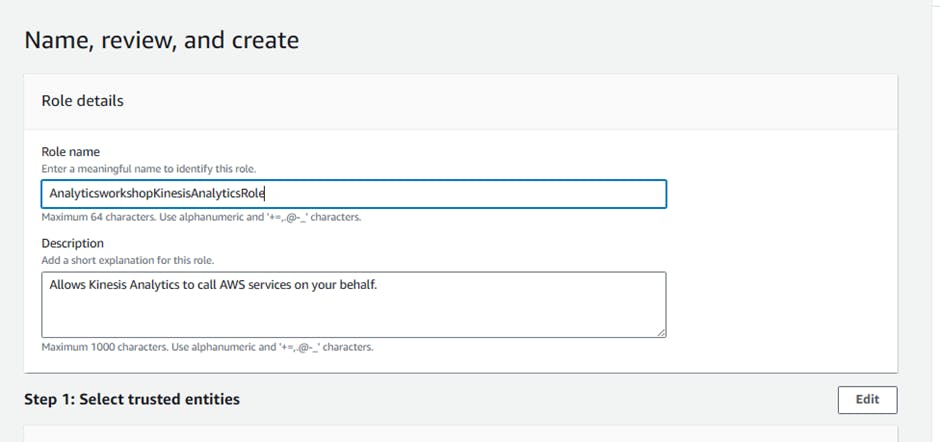
Enter Role name:
AnalyticsworkshopKinesisAnalyticsRoleMake sure that only two policies are attached to this role (AWSGlueServiceRole, AmazonKinesisFullAccess)
Optionally add Tags, e.g.:
- workshop: AnalyticsOnAWS
Click Create role
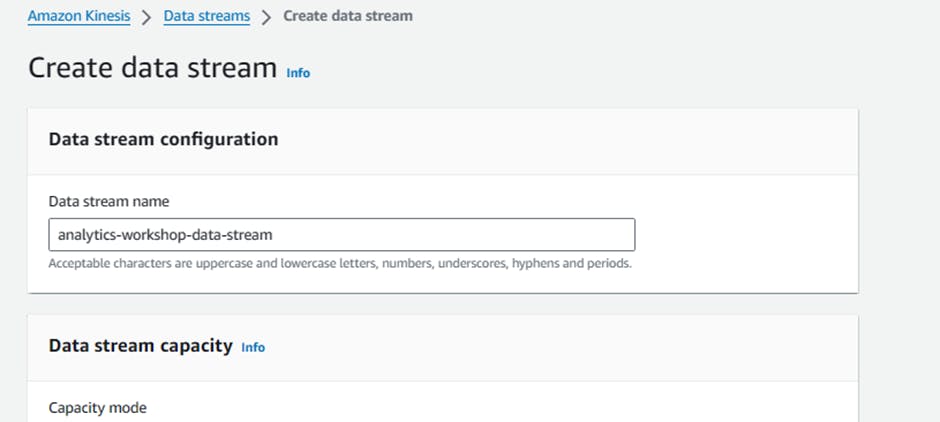
5.2 Create Kinesis Data Stream
Kinesis Data Generator is an application that makes it simple to send test data to your Amazon Kinesis stream or Amazon Kinesis Firehose delivery stream. We will create Kinesis Data Stream to ingest the data from Kinesis Data Generator. Our Kinesis Application notebook will read streaming data from this Kinesis Data Stream.
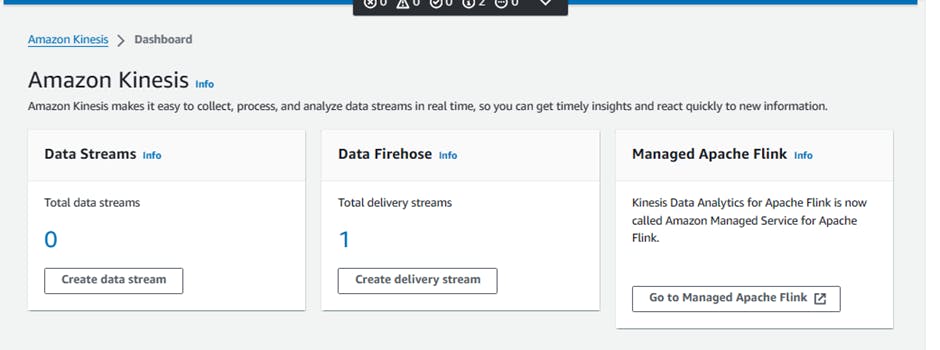
Go to AWS Kinesis service: Click me
Click Create Data Stream
Enter a data stream name:
analytics-workshop-data-streamIn Data Stream capacity:
Choose Capacity Mode:
Provisioned
Set Provisioned Shards: 2

INFO: A shard is a uniquely identified group of data records in a Kinesis data stream. A shard supports 1 MB/second and 1,000 records per second for writes and 2 MB/second for reads. So, 2 provisioned shards here can support 2 MB/second and 2,000 records per second for writes and 4 MB/second for reads.
Go down to bottom and click Create Data Stream
5.3 Create Glue Catalog Table
Our Kinesis Application Notebook will get information about the data source from AWS Glue. When you create your Studio notebook, you specify the AWS Glue database that contains your connection information. When you access your data sources, you specify AWS Glue tables contained in the database. Find more details here .
Go to: Click me
From the left sidebar, go to Databases and click our previously created database
analyticsworkshopdb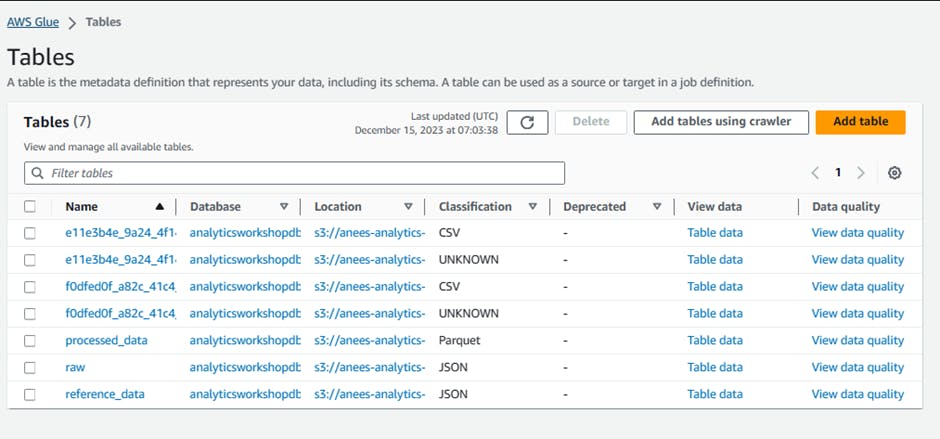
Click Tables in analyticsworkshopdb
Click Add tables drop down menu and then select Add table manually
In Table Properties
Enter Table Name:
raw_stream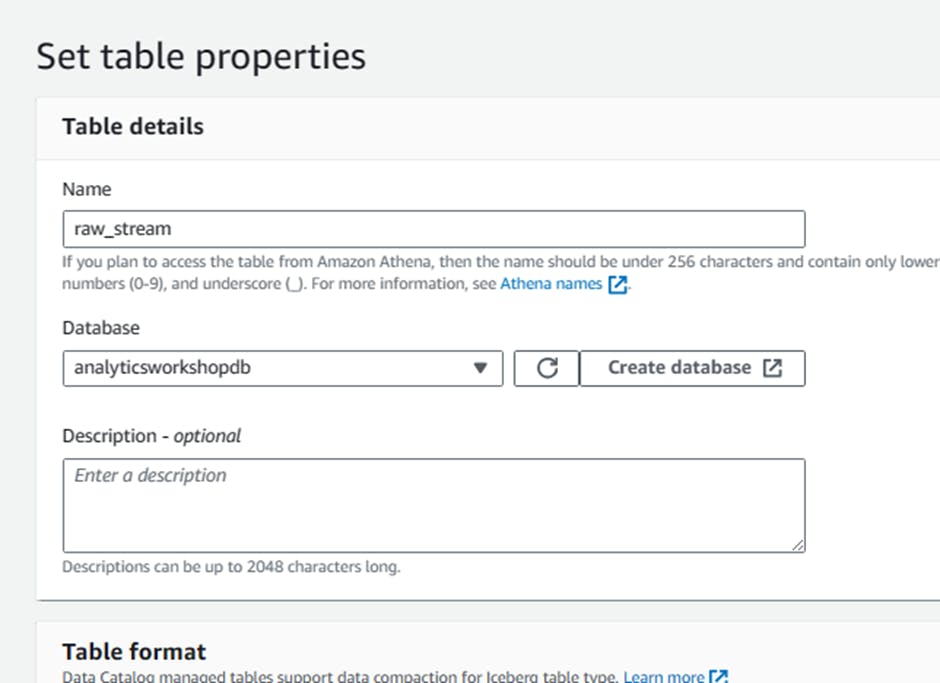
In Data store:
Select the type of source:
Kinesis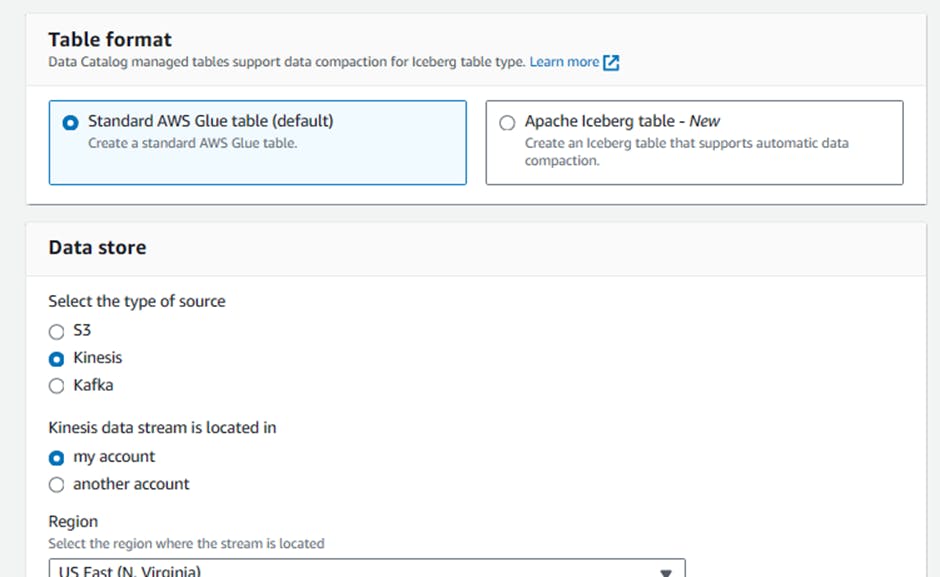
Skip Select a kinesis data stream. (Stream in my account should be selected by default)
Region:
US East (N. Virginia) us-east-1Kinesis stream name:
analytics-workshop-data-streamSkip sample size
In Data format:
Classification:
JSON
Then Click Next
In Schema:
Click Edit Schema as JSON and insert the following json text:
  [
    {
      "Name": "uuid",
      "Type": "string",
      "Comment": ""
    },
    {
      "Name": "device_ts",
      "Type": "timestamp",
      "Comment": ""
    },
    {
      "Name": "device_id",
      "Type": "int",
      "Comment": ""
    },
    {
      "Name": "device_temp",
      "Type": "int",
      "Comment": ""
    },
    {
      "Name": "track_id",
      "Type": "int",
      "Comment": ""
    },
    {
      "Name": "activity_type",
      "Type": "string",
      "Comment": ""
    }
  ]
Then Click Next
In Partition Indices:
This is not necessary for this workshop. Skip this part and click Next
INFO: Partition index is an index for partition keys defined in the table. This is useful to fetch a subset of the partitions instead of loading all partitions. Fine more information here .
Click Next
Review and create:
- Review that all information is correct and then click Create
Verify that the new Glue table
raw_streamis properly created. Refresh the table list if it has not shown up yet.Click the newly created table
raw_stream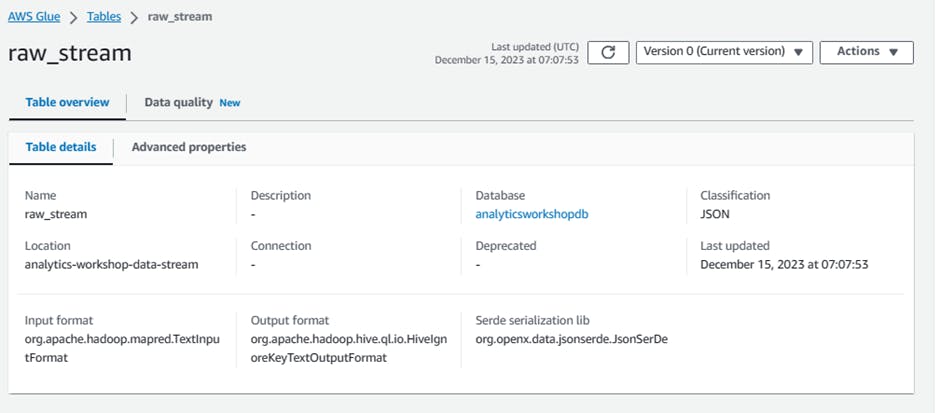
Click Actions and click Edit table
Under Table properties, add new property:
Key:
kinesisanalytics.proctimeValue:
proctime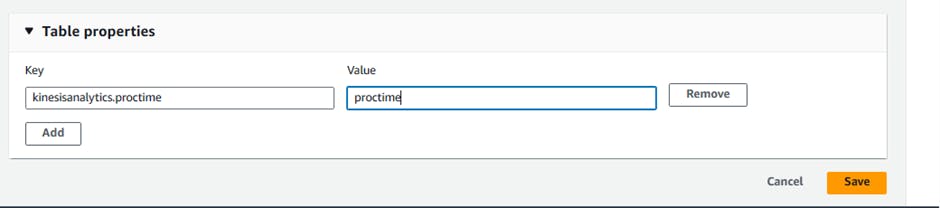
INFO: These key-values properties tell Kinesis Analytics the processed time of the data
5.4 Create Analytics Streaming Application Studio Notebook
Now let's create our Kinesis Analytics Streaming Application Studio Notebook. This Analytics application notebook can process streaming data from Kinesis Data Stream and we can write SQL analytical queries to get real-time insights such as current activity count or device temperature.
Go to: Click Me
Navigate to Studio
Click Create Studio notebook
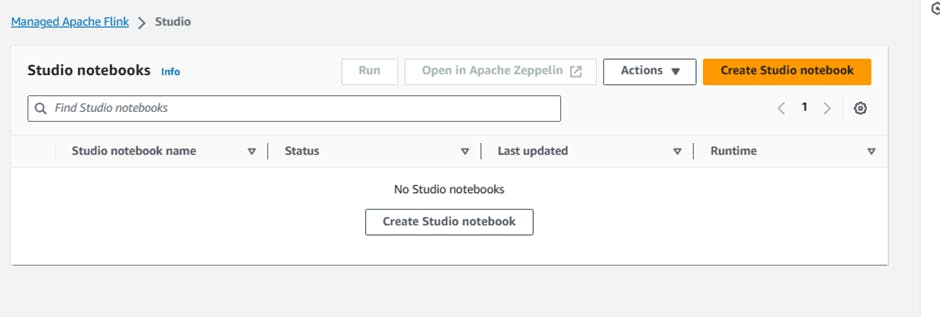
Choose
Create with custom settings
General:
Enter Studio notebook name:
AnalyticsWorkshop-KDANotebookEnter Runtime:
Apache Flink 1.11, Apache Zeppelin 0.9Click Next
In IAM role
Select Choose from IAM roles that Kinesis Data Analytics can assume
Select our previously created service role:
AnalyticsworkshopKinesisAnalyticsRole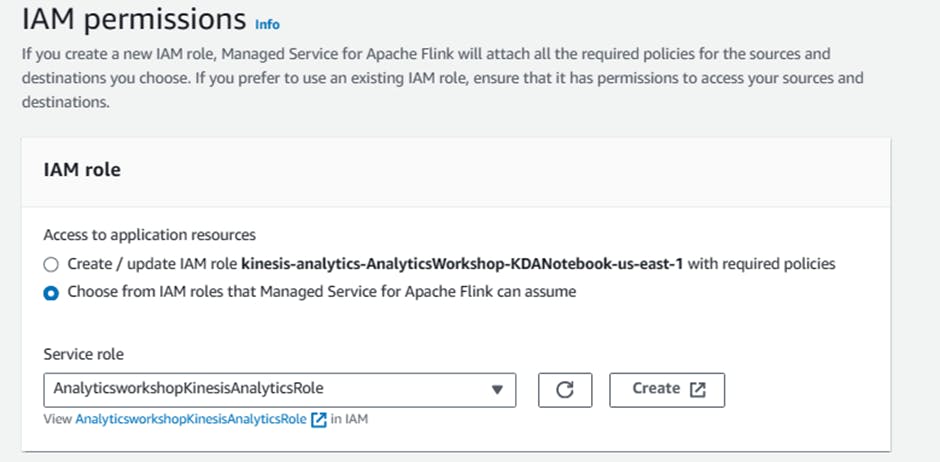
In AWS Glue database, select:
analyticsworkshopdb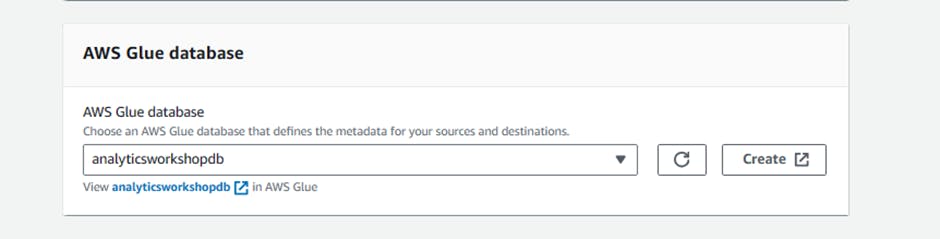
Click Next
In Configurations
Parallelism:
4Parallelism per KPU:
1Do not Turn on Logging for now (Uncheck the Turn on logging checkbox)
INFO: Logging is useful to understand errors when your application goes wrong. It requires CLoudwatchFullAccess and CloudwatchLogFullAccess permission to be added to the service role. We are skipping this part as this is not necessary to this workshop.
Skip everything else and go to the bottom
In Tags:
Optionally add Tags, e.g.:
- workshop: AnalyticsOnAWS
Click Next
In Review and create
Verify that all values are correct
Click Create Studio notebook
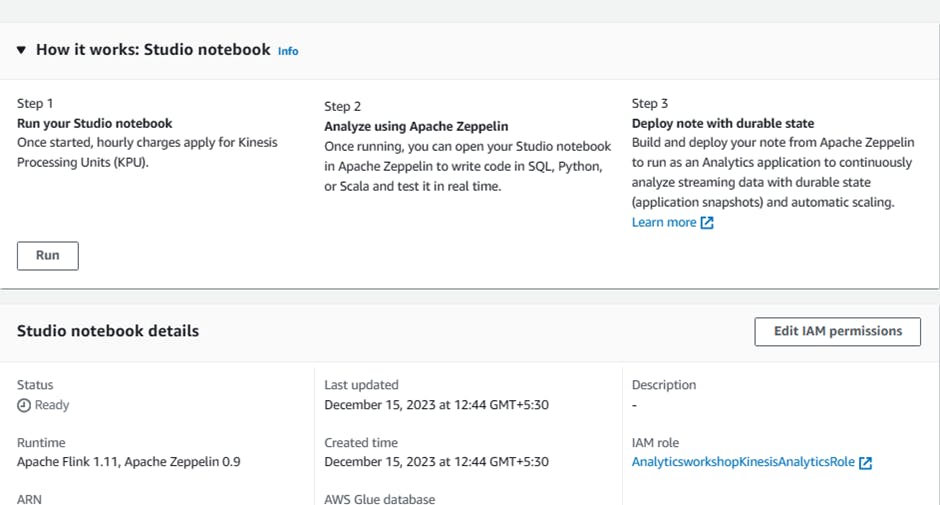
Click Open in Apache Zeppelin at the upper right hand side to open Zeppelin Notebook
Click Create new note and give the note a name
AnalyticsWorkshop-ZeppelinNote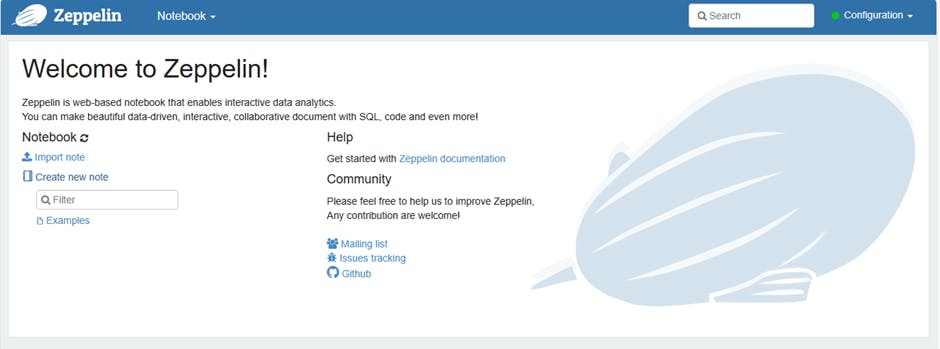
Paste this SQL query
  %flink.ssql(type=update)

  SELECT * FROM raw_stream;
This SQL query will list down all streaming data from our Kinesis Data Generator
type=updateis a Flink interpreter for Zeppelin notebook syntax. Inupdate, the notebook output will be updated continuously with new result. Find more information here .
Click Add Paragraph
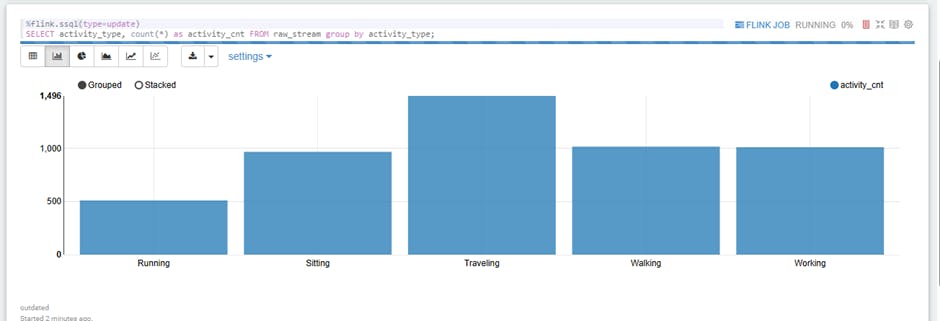
Paste this SQL query
  %flink.ssql(type=update)

  SELECT activity_type, count(*) as activity_cnt FROM raw_stream group by activity_type;
This SQL query will count the number of activities currently being done

When all queries are pasted, Click the
Playbutton at the top right of the paragraph5.5 Generate Dummy Data to Kinesis Data Stream
To display data from queries run in Analytics Streaming notebook, we have to send the raw data from our Kinesis Data Generator.
Go to the
KinesisDataGeneratorURL. You can find this in the Cloudformation stack's Output tab. Click here .Login with your username & password
Fill this out:
Region:
us-east-1Stream/delivery stream:
analytics-workshop-data-stream(DO NOT chooseanalytics-workshop-streamthat you might have created in "Ingest and Store" module of this workshop)Ensure Records per second is Constant.
Value for Records per second:
100(DO NOT change this number for the workshop.)Ensure that Compress Records is unchecked.

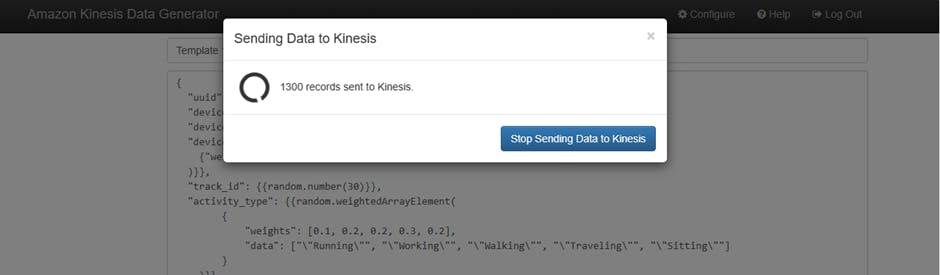
NOTE: DO NOT PAUSE after Send Data is clicked as this is required to have continuous stream of data for analysis in Zeppelin notebook.
Go back to our Zeppelin Notebook. Wait for a few minutes, the result should be displayed.

👉Task 6: Analyze with Kinesis Data Analytics
6.1 Setting Up QuickSight
In this step we will visualize our processed data using QuickSight.
- Go to: Quicksight Console Click me

Click Sign up for QuickSight
Ensure Enterprise is selected and click Continue
QuickSight account name:
yournameanalyticsworkshopNotification email address:
you@youremail.comSelect Amazon Athena - this enables QuickSight access to Amazon Athena databases
Select Amazon S3
- Select yourname-analytics-workshop-bucket
Click Finish
Wait for your QuickSight account to be created
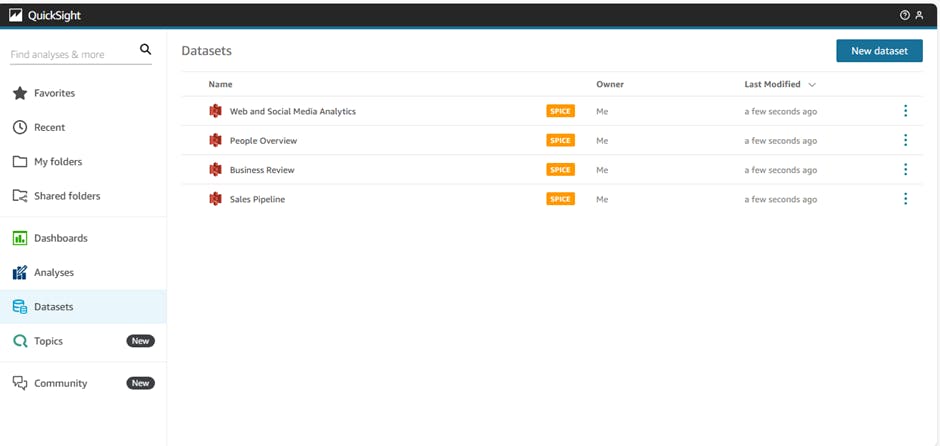
6.2 Adding a New Dataset
Go to: Click me
On top right, click New Dataset
Click Athena
New Athena data source
Data source name:
analyticsworkshop
Click Validate connection
- This will check if your QuickSight can access Athena
Click Create data source
Choose your table:
Database: contain sets of tables - select analyticsworkshopdb
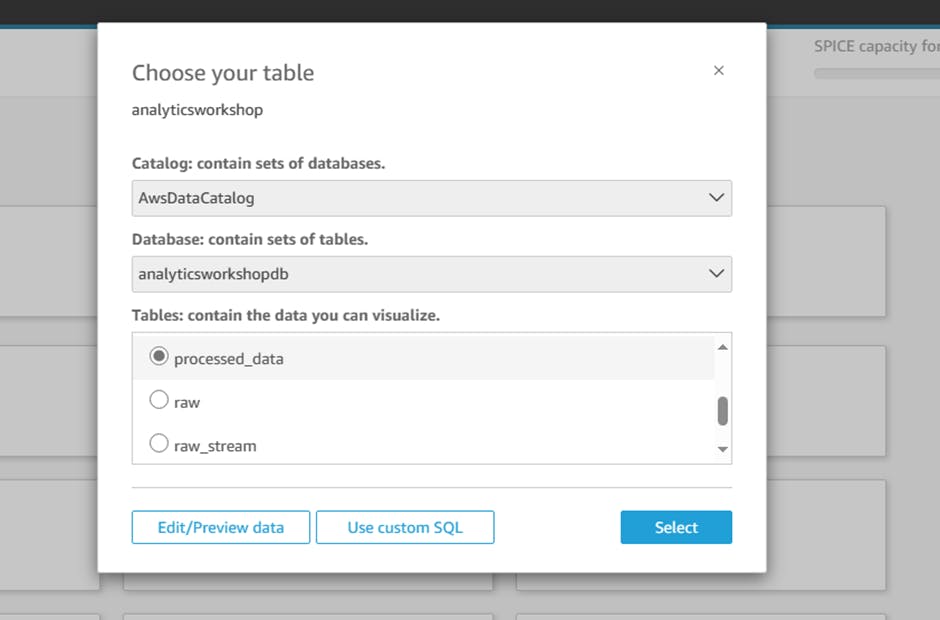
Tables: contain the data you can visualize - select processed_data
Click Select
Finish data set creation:
Select Directly query your data
Click Visualize
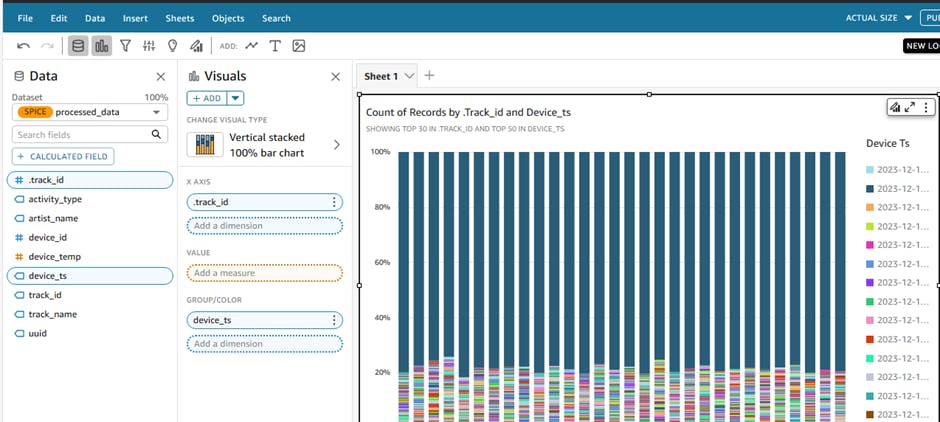
6.3 Using Amazon Quick Sight to Visualize Our Processed Data
Visualization 1: Heat map of users and tracks they are listening to
In this step, we will create a visualization that show us which users are listening to repetitive tracks
On the bottom-left panel (Visual types):
Hover on icons there to see names of the available visualizations
Click on Heat Map
On top-left panel (Fields list)
Click device_id
Click track_name

Just above the visualization you should see Field wells: Rows: device_id | Columns: track_name
If you hover on dark blue patches on the heatmap you will see that those particular users are listening to the same track repeatedly.

Up until now, we have been able to ingest data using Kinesis firehose, store the data in S3, catalog the tables in AWS Glue data catalog, transform the data using Glue ETL/EMR and query and visualize the data using Athena and Quicksight.
This provides for an end to end architecture, between the source to the business dashboards, in a serverless analytics deployment model.
👉Task 7: Serve with Lamda
7.1 Creating a Lambda Function
Go to: Lambda Console Click me
- Note: Make sure Region is selected as US East (N. Virginia) which is us-east-1
Click Create function (if you are using Lambda for the first time, then you might have to click Get Started to proceed)
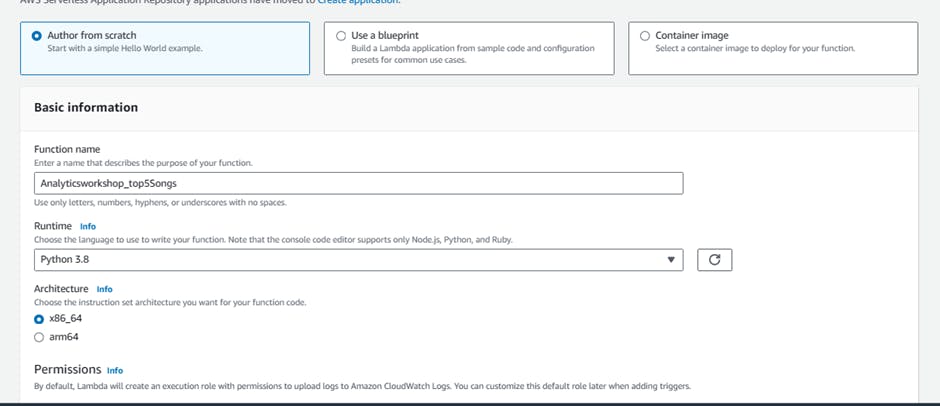
Select Author from scratch
Under Basic Information:
Give Function name as
Analyticsworkshop_top5SongsSelect Runtime as Python 3.8
Expand Choose or create an execution role under Permissions, make sure Create a new role with basic Lambda permissions is selected
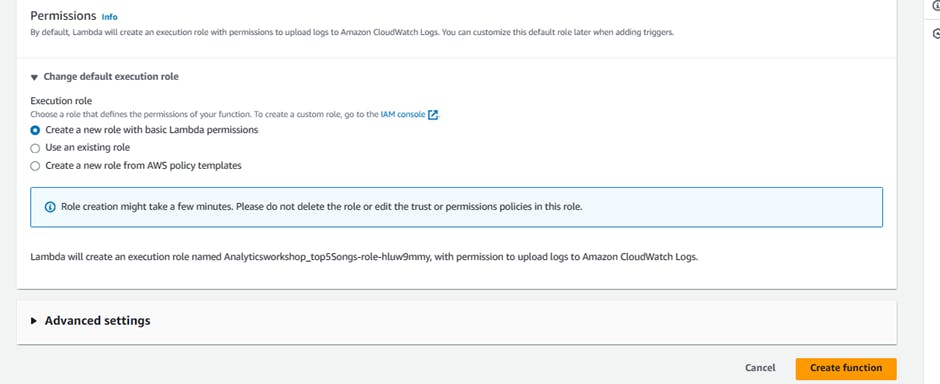
Click Create Function
7.2 Function Code
Scroll down to Function Code section and replace existing code under in lambda_function.py with the python code below:
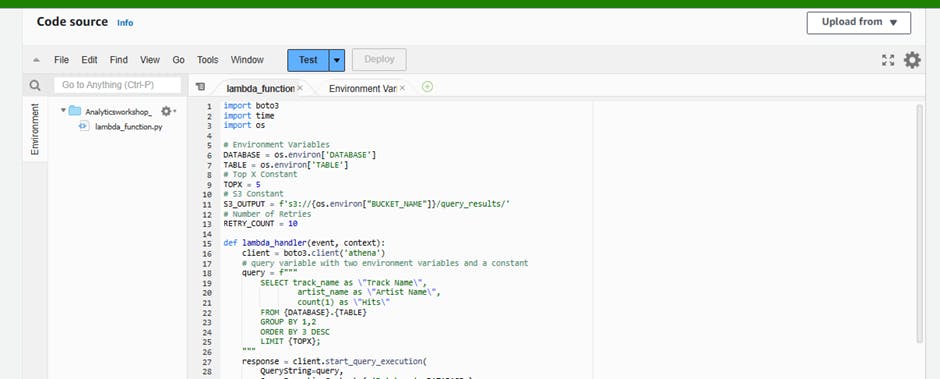
    import boto3
    import time
    import os

    # Environment Variables
    DATABASE = os.environ['DATABASE']
    TABLE = os.environ['TABLE']
    # Top X Constant
    TOPX = 5
    # S3 Constant
    S3_OUTPUT = f's3://{os.environ["BUCKET_NAME"]}/query_results/'
    # Number of Retries
    RETRY_COUNT = 10

    def lambda_handler(event, context):
        client = boto3.client('athena')
        # query variable with two environment variables and a constant
        query = f"""
            SELECT track_name as \"Track Name\",
                    artist_name as \"Artist Name\",
                    count(1) as \"Hits\"
            FROM {DATABASE}.{TABLE}
            GROUP BY 1,2
            ORDER BY 3 DESC
            LIMIT {TOPX};
        """
        response = client.start_query_execution(
            QueryString=query,
            QueryExecutionContext={ 'Database': DATABASE },
            ResultConfiguration={'OutputLocation': S3_OUTPUT}
        )
        query_execution_id = response['QueryExecutionId']
        # Get Execution Status
        for i in range(0, RETRY_COUNT):
            # Get Query Execution
            query_status = client.get_query_execution(
                QueryExecutionId=query_execution_id
            )
            exec_status = query_status['QueryExecution']['Status']['State']
            if exec_status == 'SUCCEEDED':
                print(f'Status: {exec_status}')
                break
            elif exec_status == 'FAILED':
                raise Exception(f'STATUS: {exec_status}')
            else:
                print(f'STATUS: {exec_status}')
                time.sleep(i)
        else:
            client.stop_query_execution(QueryExecutionId=query_execution_id)
            raise Exception('TIME OVER')
        # Get Query Results
        result = client.get_query_results(QueryExecutionId=query_execution_id)
        print(result['ResultSet']['Rows'])
        # Function can return results to your application or service
        # return result['ResultSet']['Rows']
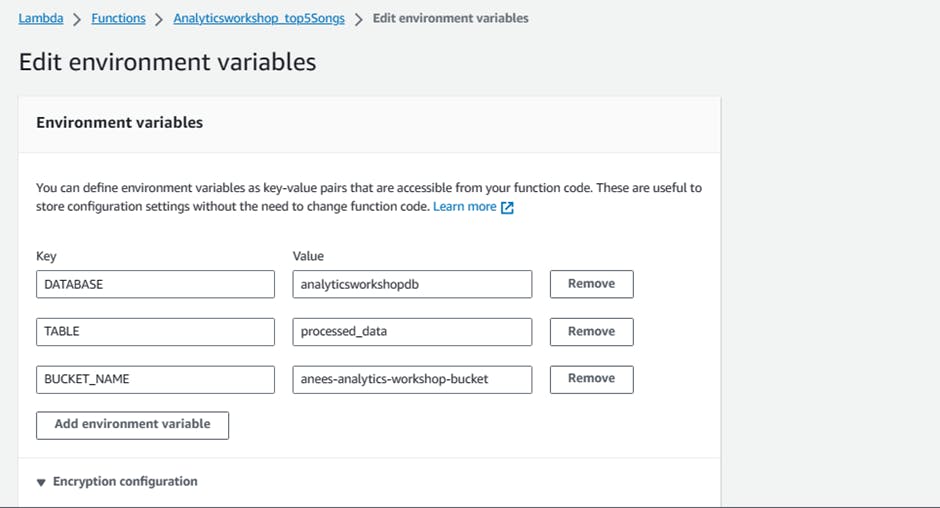
7.3 Environment Variables
Environment variables for Lambda functions enable you to dynamically pass settings to your function code and libraries, without making changes to your code. Read more about Lambda Environment Variables here - docs.aws.amazon.com/lambda/latest/dg/env_va..
Scroll down to Environment variables section and add below three Environment variables.
Key:
DATABASE, Value:analyticsworkshopdbKey:
TABLE, Value:processed_dataKey:
BUCKET_NAME, Value:yourname-analytics-workshop-bucket
Leave the Memory (MB) as default which is 128 MB
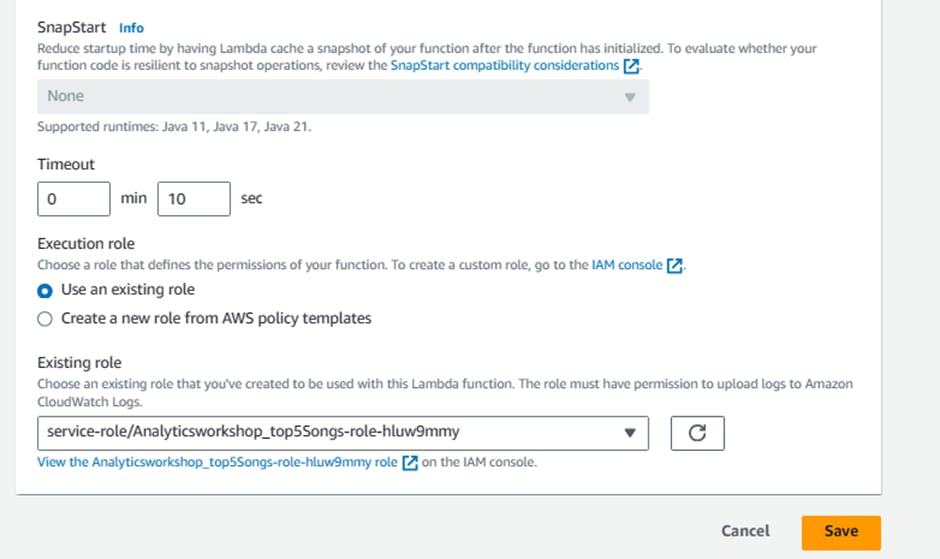
Change Timeout to 10 seconds.
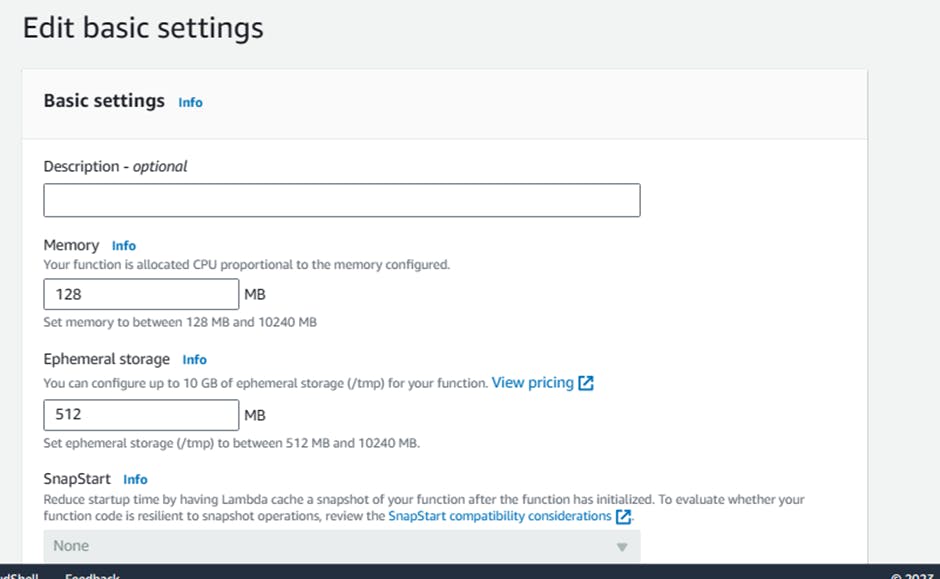
Optionally add Tags, e.g.:
- workshop: AnalyticsOnAWS
Click Save
7.4 Execution Role
Select the Permissions Tab at the top:
- Click the Role Name link under Execution Role to open the IAM Console in a new tab.
Click Add permissions and click Attach policies
Add the following two policies (search in filter box, check and hit Attach policy):
AmazonS3FullAccessAmazonAthenaFullAccess
Once these policies are attached to the role, close this tab.
7.5 Configuring The Test Event
Our function is now ready to be tested. Deploy the function first by clicking on Deploy under the Function code section.
Next, let's configure a dummy test event to see execution results of our newly created lambda function.
Click Test on right top hand corner of the lambda console.
A new window will pop up for us to configure test event.
Create new test event is selected by default.
Event name: Test
Template: Hello World
Leave everything as is
Click Save
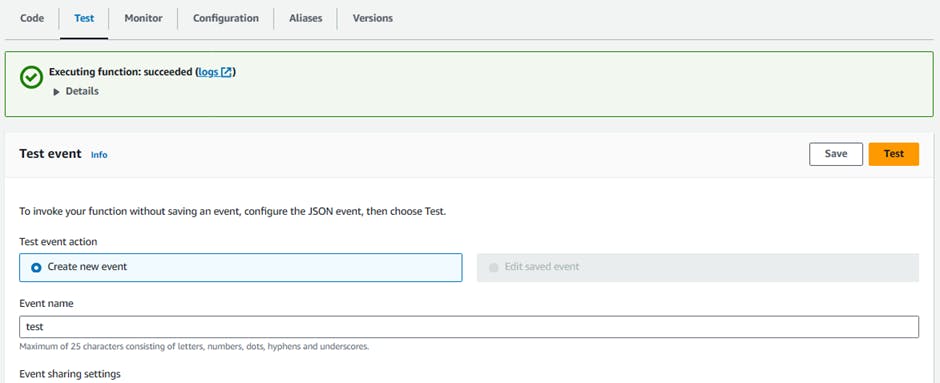
Click Test again
You should be able to see the output in json format under Execution Result section.
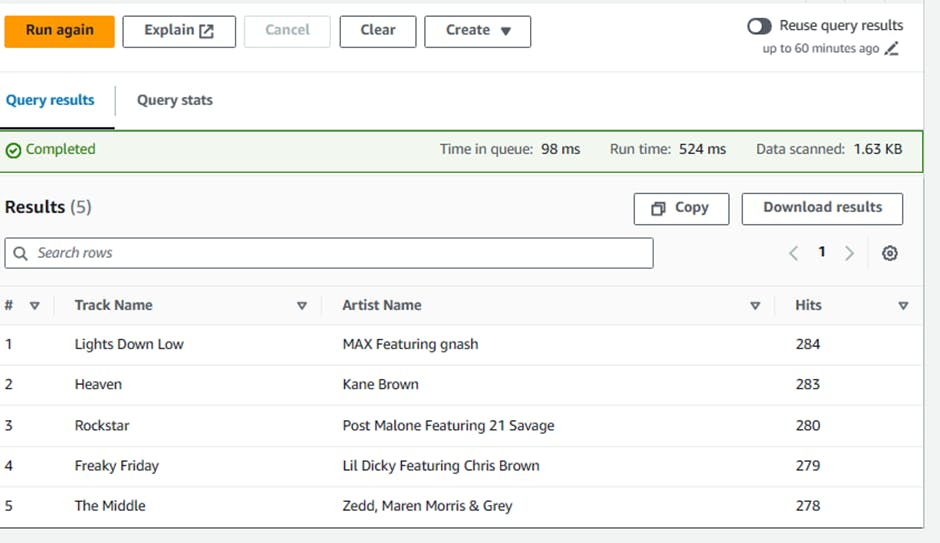
7.6 Verification through Athena
Let's verify the results through Athena
Go to: Athena Console Click me
On the left panel, select analyticsworkshopdb from the dropdown
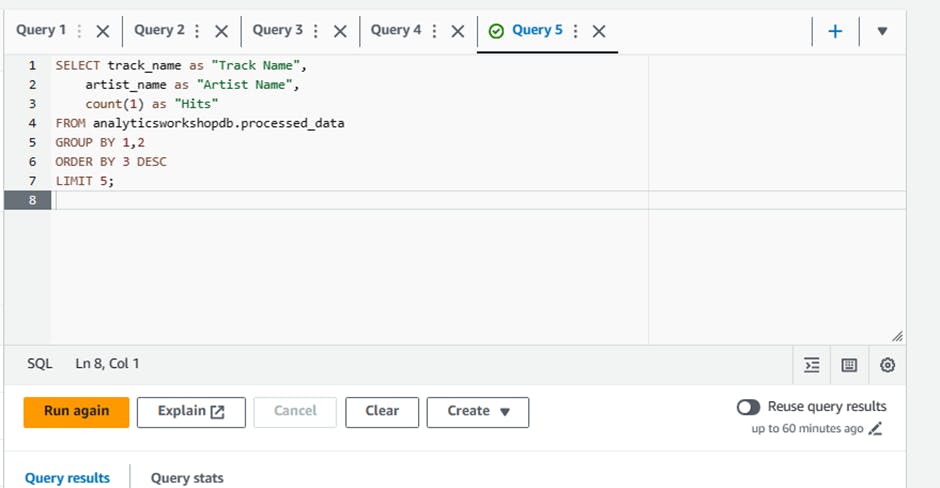
Run the following query:
  SELECT track_name as "Track Name",
      artist_name as "Artist Name",
      count(1) as "Hits"
  FROM analyticsworkshopdb.processed_data
  GROUP BY 1,2
  ORDER BY 3 DESC
  LIMIT 5;
👉Task 7:Cleanup
Kinesis Firehose Delivery Stream - Go to: Kinesis Console Click me. Delete Firehose: analytics-workshop-stream
Kinesis Data Stream - Go to: Kinesis Console Click me. Delete Data Stream: analytics-workshop-data-stream
Kinesis Data Analytics Studio Notebook - Go to: Kinesis Console Click me. Delete Notebook: AnalyticsWorkshop-KDANotebook
Lambda - Go to: Lambda Console Click me. Navigate to list of functions and select Analyticsworkshop_top5Songs. Under Actions drop down menu, select Delete.
Glue Database - Go to: Glue Console Click me. Delete Database: analyticsworkshopdb
Glue Crawler - Go to: Glue Crawlers Click me. Delete Crawler: AnalyticsworkshopCrawler
Glue Studio Job - GoTo: https://us-east-1.console.aws.amazon.com/gluestudio/home?region=us-east-1#/jobs
Check - AnalyticsOnAWS-GlueStudio/ AnalyticsOnAWS-GlueIS Click Action and choose Delete job(s)
Glue DataBrew projects - GoTo: https://console.aws.amazon.com/databrew/home?region=us-east-1#projects . Check AnalyticsOnAWS-GlueDataBrew . Click Action and choose Delete.
Glue DataBrew datasets - GoTo: https://console.aws.amazon.com/databrew/home?region=us-east-1#datasets . Check dataset name: reference-data-dataset and raw-dataset. Click Action and choose Delete. Confirm deletion by clicking Delete
Delete IAM Role - Go to: IAM Console Click me. Search for following roles and delete: Search for following roles and delete: Analyticsworkshop-GlueISRole / AnalyticsworkshopKinesisAnalyticsRole / Analyticsworkshop_top5Songs-role-
Delete IAM Policy - Go to: IAM Console Click me. Search for following policies and delete: AWSGlueInteractiveSessionPassRolePolicy
Delete S3 bucket. Go to: S3 Console Click me. Delete Bucket: yourname-analytics-workshop-bucket.
Delete the Cognito CloudFormation Stack - Go to: CloudFormation Click me. Click: Kinesis-Data-Generator-Cognito-User. Click: Actions > DeleteStack
Close QuickSight account - Go to: Quicksight Console Click me.
Click: Unsubscribe
Cognito Userpool - Go to: Cognito Console Click me.
Click Kinesis Data-Generator Users. Click Delete Pool
The creation of simulated data has been accomplished, and a comprehensive analysis of this data has been conducted using a combination of Kinesis data analysis, AWS Glue, AWS Lambda, and Athena.
Thank you for reading all the way
Keep Learning Keep Sharing! 🙂