Networking in AWS cloud

What is cloud networking?
Cloud networking uses a centralized third-party resource provider for connectivity between various network resources and acts as a gatekeeper to the applications.
Cloud Networking resources
Master cloud networking skills by Leveraging cloud infrastructure, network management, network monitoring, and maintenance. In other words, you design, configure, manage, and fine-tune network resources in the cloud to build simple, complex, and resilient networks.
Virtual routers
Virtual private networks (VPNs)
Virtual firewalls
Data connectivity
Load balancers
Virtual bridges
Virtual adapters and many more
How to choose the appropriate networking route:
Cloud networks are elastic. Depending on the requirement of the organization they can select between cloud-based networking or cloud-enabled networking and on-premises cloud where the organization uses the private cloud exclusively reserved for them.
Cloud-based networking- here the network management software and physical hardware are in the cloud. An example of this type of cloud network would be interconnecting virtual machines for a client or organization. They can be divided into infrastructure as a cloud(IaaS), platform as a cloud(IaaS), and software as a cloud(IaaS).
Cloud-enabled networking(hybrid cloud)- combines traditional onsite network infrastructure and cloud access. In this model, the primary network infrastructure remains remote while the network’s overall management is done in the cloud.
The cloud service we are going to explore today will be on AWS.
Amazon VPC:
It enables us to create a private network where we can build our infrastructure similar to what we create in the traditional on-premises, here the benefit is that we do not have to invest in the heavy maintenance of the data centers, as we create the services on demand. VPC can be created in a single region, but it can stretch all the availability zones within a region.
CIDR enables to allocation of IP addresses in a more efficient way via network prefix /16-/28. While creating a VPC IPV4 address should be specified by choosing the CIDR block which ranges from /16-65,536 addresses to /28 - 16 addresses
Subnets:
A subnet, or subnetwork, is a segmented portion of a larger network. More specifically, subnets are a logical partition of an IP network into multiple, smaller network segments.
Route tables:
These tables enable the connectivity between the subnets and the server in them through the internet gate, NAT gateway, and the endpoints. Here we set the rules in the created VPC.
Security:
Security of the VPC is set through NACLs at the subnet level, firewalls control the traffic at the VPC level, and security groups at the server level.
Hands-on
We will be setting up the
VPC & Subnets
Route table (internet gateway, NAT gateway)
Endpoints ( Interference & gateway)
Security (NACLs and Security group)
EC2 -( private and public)

1-VPC and Subnets
1.1 Go to VPC console create VPC
1.2 Add name tag VPC A
1.3 Check the IPV4 radio button
1.4 Enter CIDR (10.0.0.0/16)
1.5 Select no for CIDR 16
1.6 Tenancy-default
1.7 Create VPC
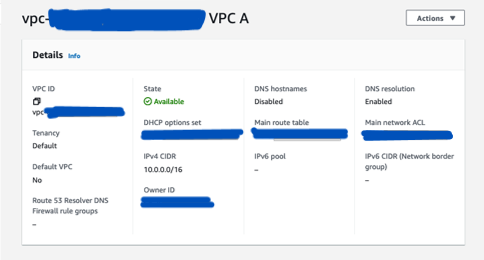
1.8 Go to Actions and edit the VPC setting then check the DNS hostname box and save
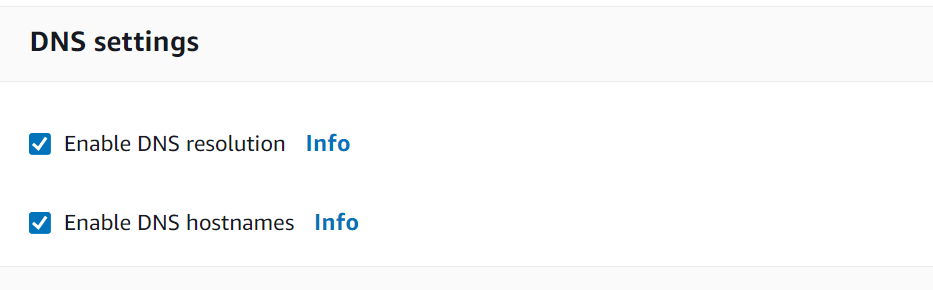
This will create your VPC successfully
1.9 Choose the subnets from the left pan
1.10 Click on Create Subnet
Enter the name as VPC A Public Subnet AZ1
Select the Availablity Zone of
us-west-1aEnter a CIDR block of
10.0.0.0/24:Add new subnet
Similarly create VPC A Public Subnet AZ2 /
us-west-1b/10.0.2.0/24Similarly create VPC A Private Subnet AZ1 /
us-west-1a/10.0.1.0/24Similarly create VPC A Private Subnet AZ2 /
us-west-1b/10.0.3.0/24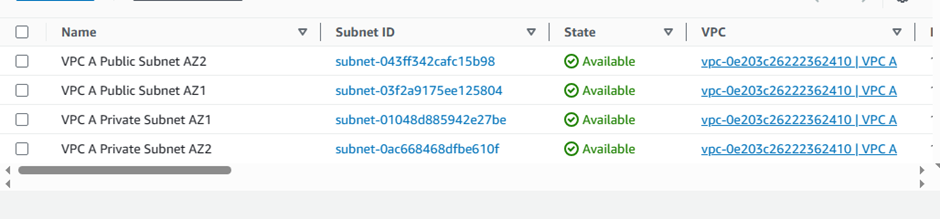
This will successfully create 2 subnets each in the public and private
2-Route table (internet gateway, NAT gateway)
2.1 Choose the Route table from the left pan
2.2 Click on the Create Route table
Enter the name as
VPC A Public Route TableSelect the VPC as
VPC ACreate Route table
Similarly create
VPC A Private Route Table
2.3 Select VPC A Public Route Table
2.4 Select VPC A Public Subnet AZ1 and VPC A Public Subnet AZ2 and click Save association
2.5 Select VPC A Private Route Table
2.4 Select VPC A Private Subnet AZ1 and VPC A Private Subnet AZ2 and click Save association

2.5 Choose the Internet gateway from the left pan
2.6 Click on the Create Internet gateway
Enter the name as
VPC A IGWCreate IGW
Go to actions and attach the gateway to the VPC A
Select VPC A Public Route Table and edit the route
Add route * Enter
0.0.0.0/0in the Destination * Selectinternet Gatewayfrom the Target dropdown
2.7 Choose the NAT gateway from the left pan
2.8 Click on the Create NAT gateway
Choose
VPC A Public Subnet AZ1Click allocate Elastic IP
Create NAT GW
Select VPC A Private Route Table and edit the route
Add route * Enter
0.0.0.0/0in the Destination * SelectNAT Gatewayfrom the Target dropdown
3- Endpoints
3.1 Choose the Endpoints from the left pan
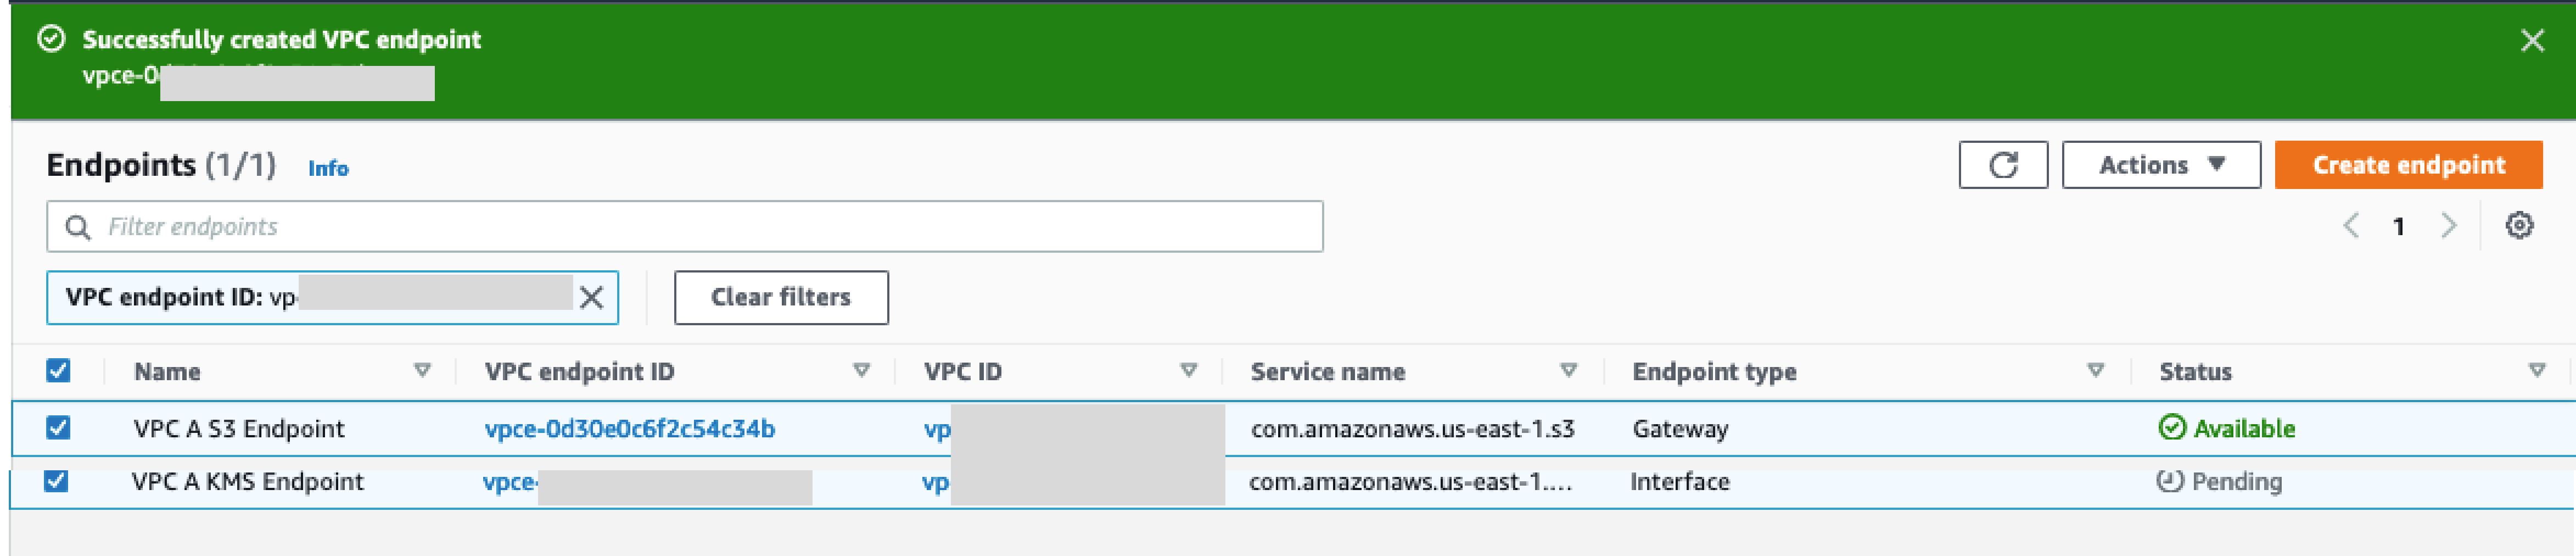
3.2 Click on the Create Endpoints [KMS/S3]
Enter the name as
VPC A KMS EndpointSearch for KMS and select kms service associated with (interface)
Select VPC as VPC A/enable DNS name
Select
VPC A Private Subnet AZ1andVPC A Private Subnet AZ2Select default Security Group and check full access
Create Endpoint
3.3 Similarly create for S3 gateway
Enter the name as
VPC A S3 EndpointSearch for S3 and select S3 service associated with (gateway)
Select VPC as VPC A
Select
VPC A Public and VPC A Private route tableCheck full access
Create Endpoint
4- Security (NACLs and Security group)
4.1 Choose the Network ACL from the left pan
4.2 Click on the Create Network ACL
Enter the name as
VPC A Workload Subnets NACLSelect VPC A from the dropdown
Click Create Network ACL

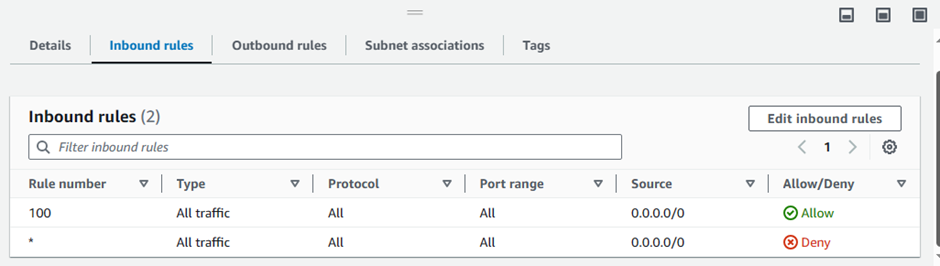
4.3 Select the checkbox for VPC A Workload Subnets NACL, then edit the subnet association, select all 4 subnets
4.4 Select the check box for VPC A Workload Subnets NACL for VPC A
Select the Inbound Rules tab below
Notice we have only DENY all rule
Click Edit inbound rules
In the Edit inbound rules screen
Click Add new rule
Input
100in Rule numberChoose All traffic in Type
Leave Source as
0.0.0.0/0Click Save changes
5- Launch an instance in both public and private subnet
5.1 For VPC A Public AZ2 Server with Amazon Linux 2023 AMI will be selected, and the instance type is t2.micro. Auto-Assign Public IP setting to enable
5.2 Create a security group with Inbound security group rules under the Type select All ICMP - IPv4 and enter 0.0.0.0/0 as the Source
5.3 Expand Advanced network configuration and under Primary IP enter 10.0.2.100.
5.4 Expand Advanced details/ Under IAM Instance profile select NetworkWorkshopInstanceProfilethen launch instance
5.5 For VPC A Private AZ1 Server with Amazon Linux 2023 AMI will be selected, and the instance type is t2.micro. Auto-Assign Public IP setting to disable
5.6 Security group similar to the Public instance. Expand Advanced network configuration and under Primary IP enter 10.0.1.100.
5.4 Expand Advanced details/ Under IAM Instance profile select NetworkWorkshopInstanceProfilethen launch instance

Test the connectivity:
- In the Instances section of the EC2 console
Select the
VPC A Public AZ2 Server instanceScroll down to the Details tab
Copy the Public IPv4 address
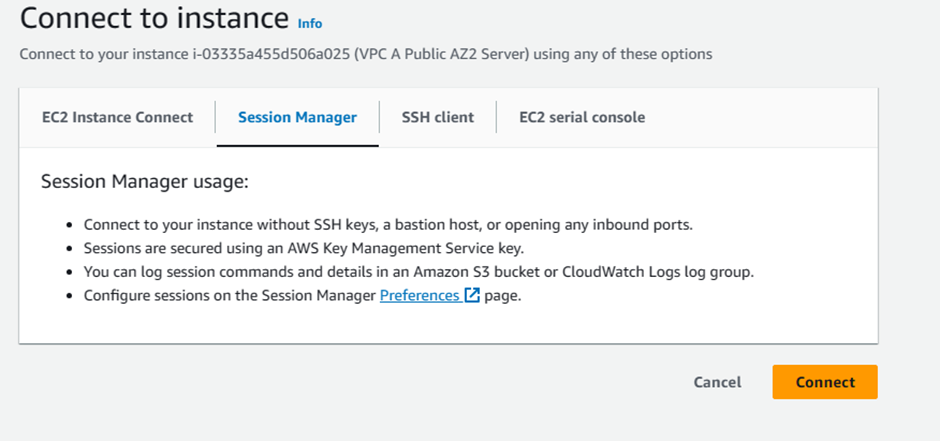
Click on Connect
Select the session manager then connect
Test the instance connection with
ping <public IPV6 address> -c 5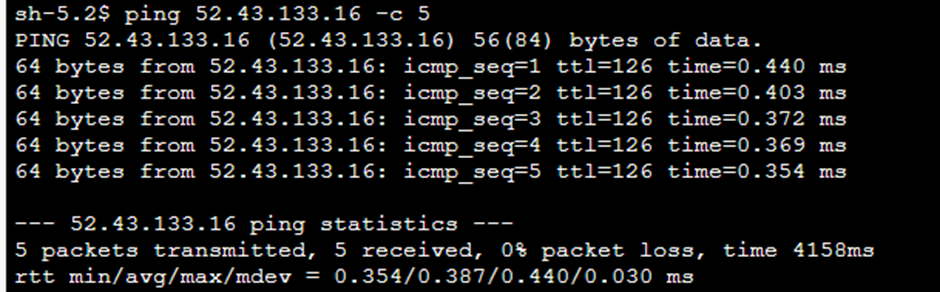
This output indicates that the public EC2 instance has successfully connected with the internet
In the Instances section of the EC2 console
Select the
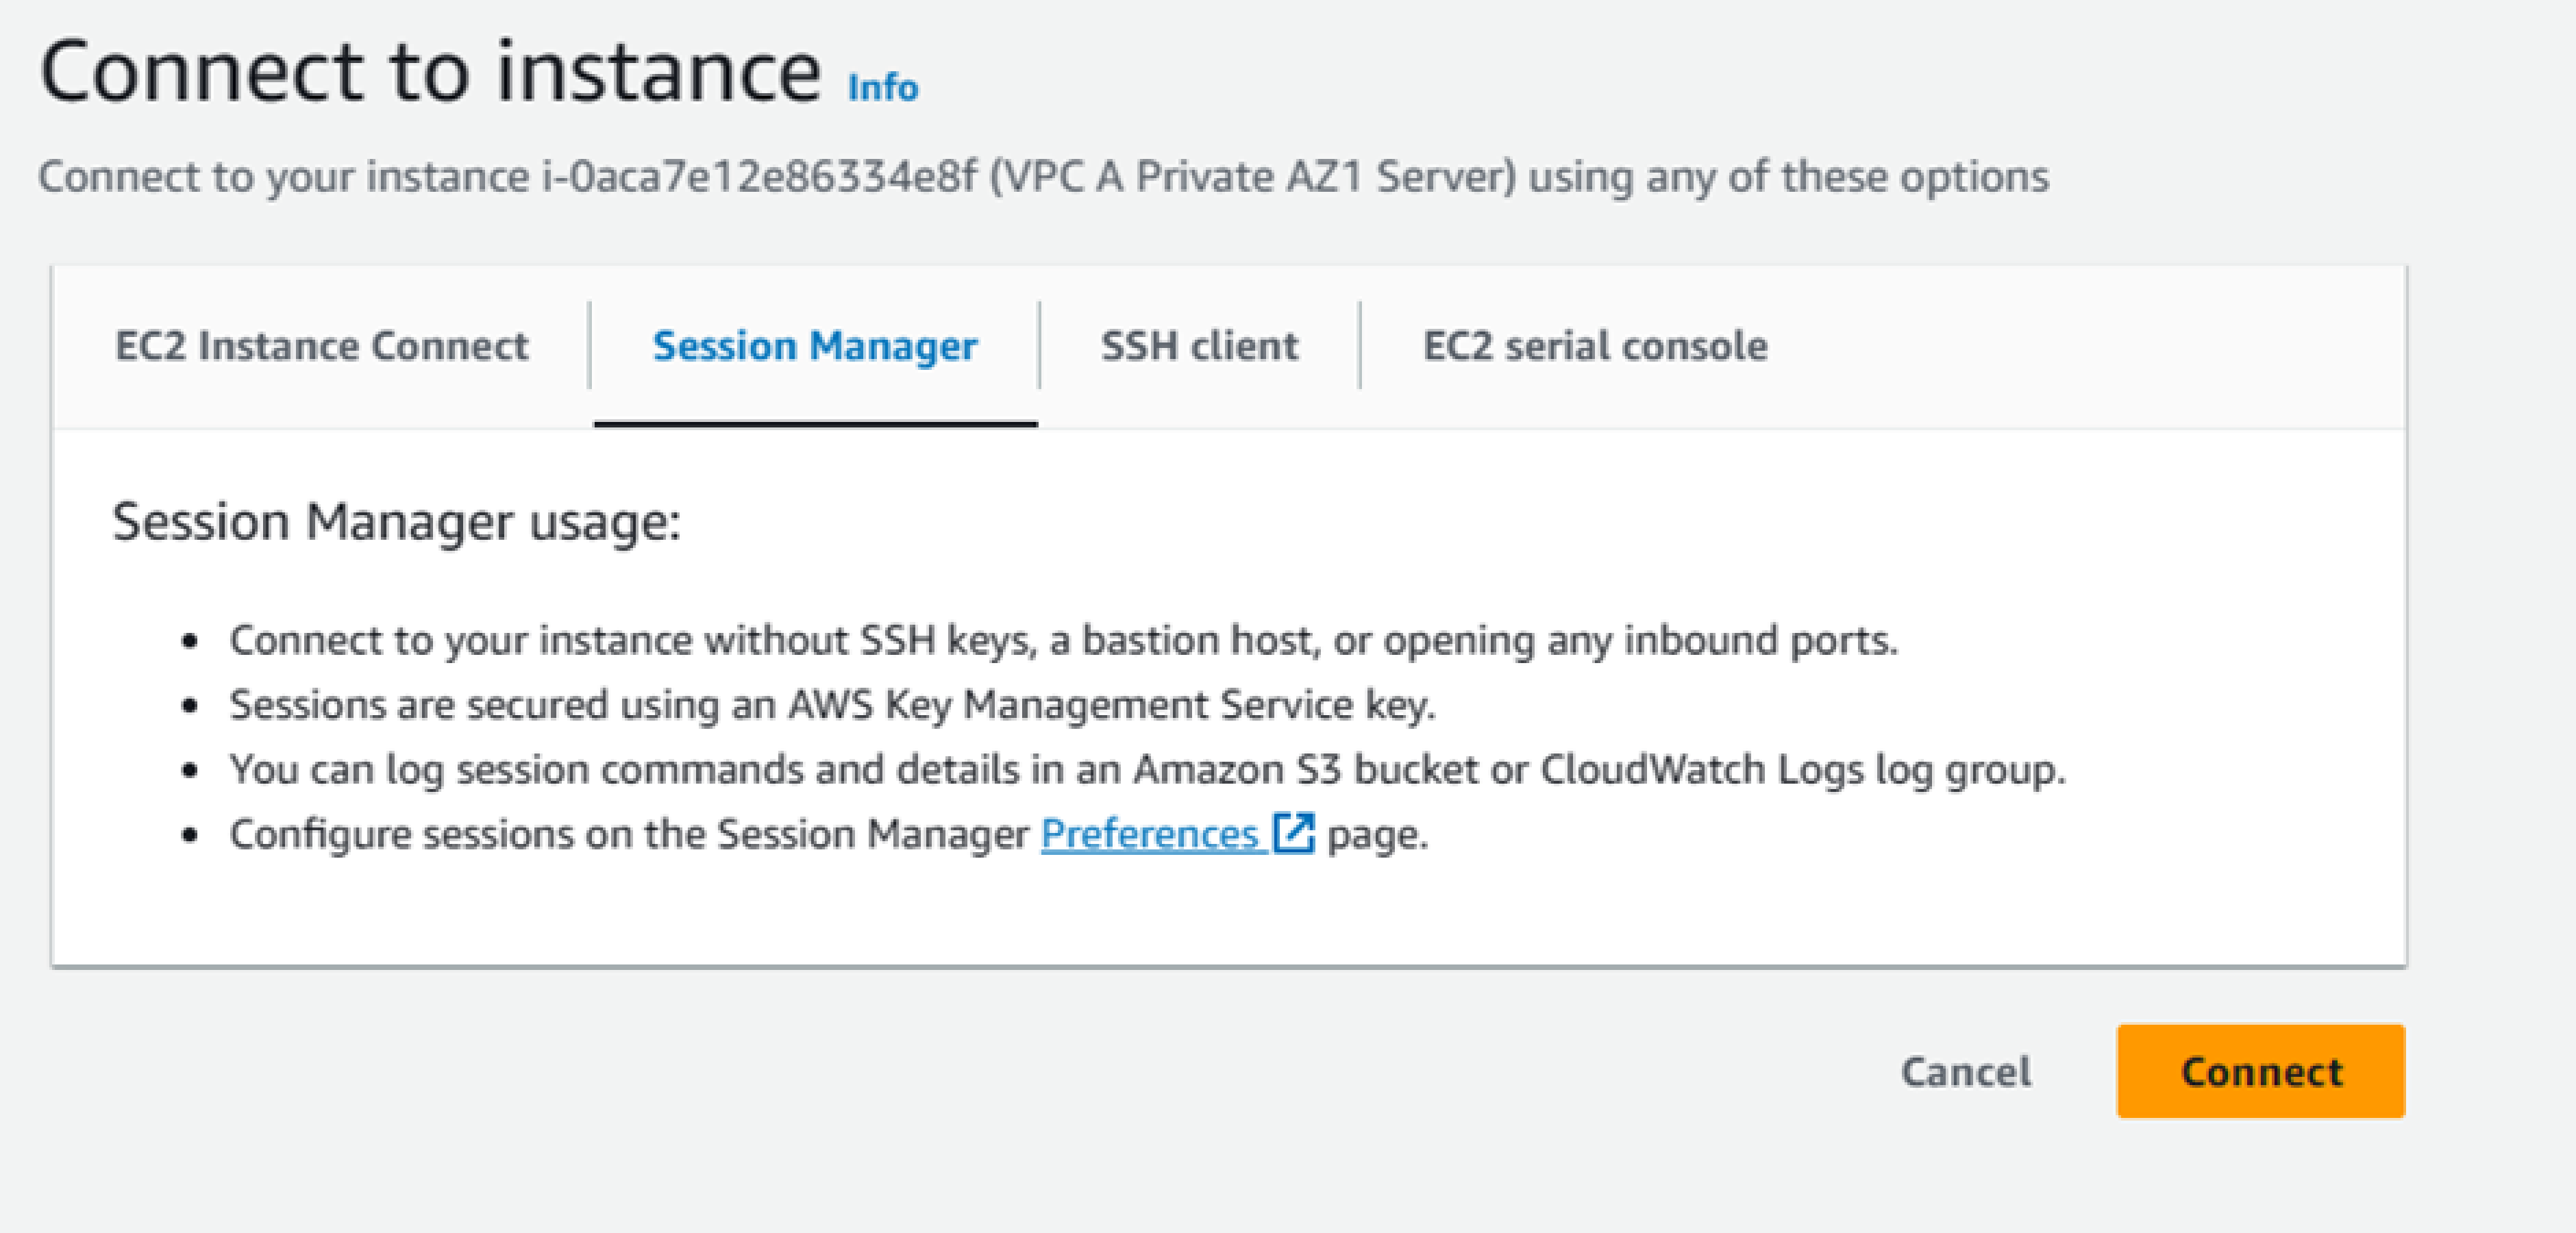
VPC A Private AZ1Server instanceClick on Connect
Select the session manager then connect
Test connectivity to both the public instance at
10.0.2.100and external connectivity toamazon.comvia the NAT Gateway.ping 10.0.2.100 -c 5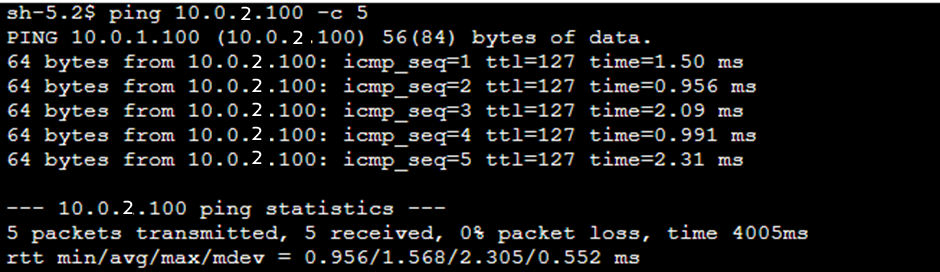
ping amazon.com -c 5

To check the DNS for the KMS service from the VPC A instance session manager
dig kms.us.west-1.amazonaws.com
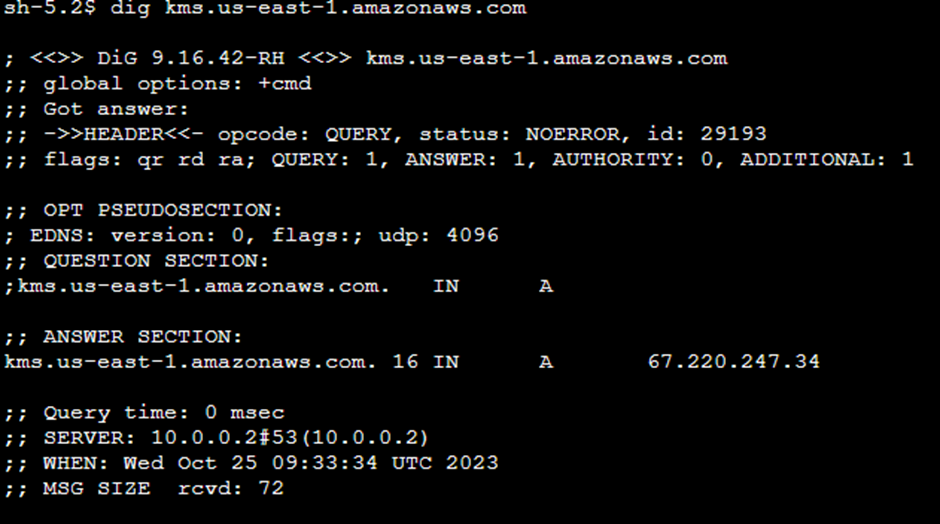
We have successfully established the connection between private and public subnets across the availability zones with internet access in public and access to the private subnet server via the nat gateway. This marks the end of building a networking foundation in the AWS cloud.
Hope you will enjoy reading this part of the networking exploration.
Will meet again in the next series of learning again!